
My Claude Code Workflow And Personal Tips
How I use roadmap + task files to manage Claude Code, and my personal tips for effective Claude Code usage.

I have shared bits and pieces of my current coding workflow with Claude Code (and Cursor).
Many people wanted to know more details and the exact setup I use, so here it is, along my personal tips on how to use Claude Code effectively.
My Current Workflow Setup
ROADMAP.md
Have a ROADMAP.md file inside docs folder: docs/ROADMAP.md.
I initially had the file at the root folder of the project, but it became too cluttered, so I move it into docs folder.
The ROADMAP.md describes two things:
The overall development process
The high level overview of each task in a few bullet points
The ROADMAP.md file acts as the single entry point to planning out new features, adjusting priorities and working on new tasks.
Make sure to include the ROADMAP.md file explicitly inside CLAUDE.md (via the CLAUDE.md import syntax) or Cursor rules (via reference).

You can verify that the import is working by using the /status command inside Claude Code, it should print out full the memory import structure:

By explicitly including the file as part of memory / rules, the agent has access to the full high-level context of the project for each task, effectively grounding the agent and guiding it to the correct path.
Here’s an excerpt of my current ROADMAP.md for my new app 16x Writer, which describes the development workflow and high-level tasks / features:
# 16x Writer Development Roadmap

Web platform for AI-assisted writing and editing of blog posts.

## Overview

// High-level overview of the project, what it does, the main features

## Development Workflow

1. **Task Planning**

- Study the existing codebase and understand the current state
- Update `ROADMAP.md` to include the new task
- Priority tasks should be inserted after the last completed task

2. **Task Creation**

- Study the existing codebase and understand the current state
- Create a new task file in the `/tasks` directory
- Name format: `XXX-description.md` (e.g., `001-db.md`)
- Include high-level specifications, relevant files, acceptance criteria, and implementation steps
- Refer to last completed task in the `/tasks` directory for examples. For example, if the current task is `012`, refer to `011` and `010` for examples.
- Note that these examples are completed tasks, so the content reflects the final state of completed tasks (checked boxes and summary of changes). For the new task, the document should contain empty boxes and no summary of changes. Refer to `000-sample.md` as the sample for initial state.

3. **Task Implementation**

- Follow the specifications in the task file
- Implement features and functionality
- Update step progress within the task file after each step
- Stop after completing each step and wait for further instructions

4. **Roadmap Updates**

- Mark completed tasks with ✅ in the roadmap
- Add reference to the task file (e.g., `See: /tasks/001-db.md`)

## Development Phases

### Phase 1: Content Management Foundation ✅

- **Task 001: Database Schema** ✅ - Complete
  - See: `/tasks/001-db.md`
  - Implemented 5 core tables: `context`, `prompts`, `posts`, `post_versions`, `post_context`
  - Added UUID primary keys and proper relationships
  - Created CRUD operations and seed data
  - Generated migration files

### Phase 2: Core Writing Experience (MVP) ✅

- **Task 002: Source Library UI** ✅ - Complete

  - See: `/tasks/002-source-library.md`
  - ✅ List view with filtering and search functionality
  - ✅ Add/edit source forms with comprehensive metadata fields
  - ✅ Grid/list view toggle for source display
  - ✅ Source management with CRUD operations
  - ✅ API endpoints for source management (`/api/sources`)
  - ✅ Real-time source list with SWR for data fetching
  - ✅ Delete confirmation dialogs and optimistic updates

- **Task 003: End-to-End Testing** ✅ - Complete

  - See: `/tasks/003-e2e-testing.md`
  - ✅ Playwright setup with TypeScript support
  - ✅ Authentication flow tests (sign up, login)
  - ✅ Source library CRUD tests
  - ✅ Test environment configuration
  - ✅ CI/CD integration

// More tasks...
I have published the full ROADMAP.md on GitHub for your reference.
我已将完整的 ROADMAP.md 发布在 GitHub 上供您参考
Individual Task Plans 个人任务计划
While ROADMAP.md gives the high-level overview of each task, the detailed planning of each task is carried out separately as individual files inside tasks folder:
虽然 ROADMAP.md 提供了每个任务的高层概述,但每个任务的详细规划作为单独文件分别在 tasks 文件夹内进行:
001-db.md002-source-library.md003-e2e-testing.md004-source-refactor-context.md…
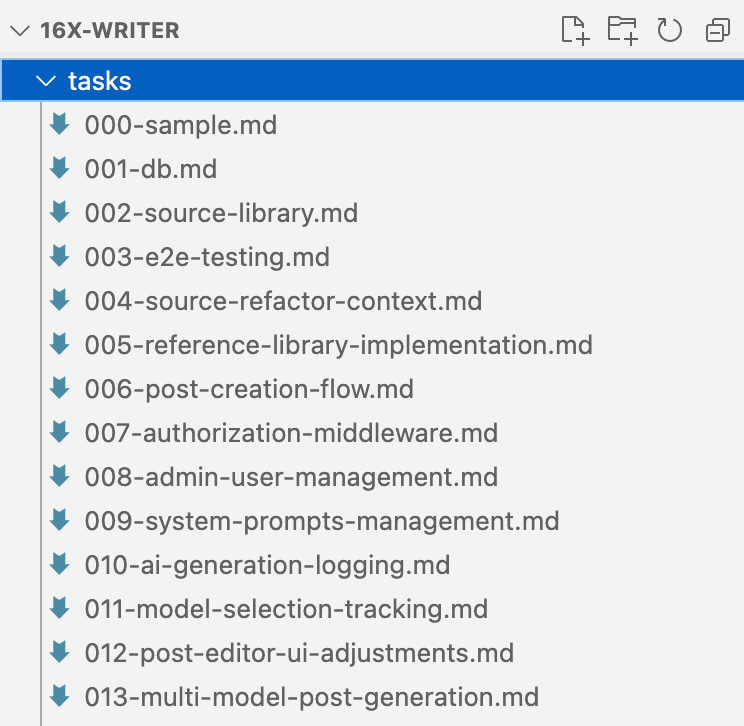
16x Writer 示例任务规划文件的截图
You can think of these files are a combination of PRD (product requirement document) and system design (architecture) for each feature. Each file includes the following components:
你可以将这些文件视为每个功能的产品需求文档(PRD)和系统设计(架构)的组合。每个文件包含以下组成部分:
Prerequisites 先决条件
Background and requirements
背景与要求Current state and desired states
当前状态和期望状态Implementation steps 实施步骤
Files that needs to modified and created
需要修改和创建的文件Acceptance criteria 验收标准
Here is an excerpt of a sample task planning file:
以下是一个示例任务规划文件的摘录:
# Task 012: Post Editor UI Adjustments

## Progress Summary

**Status**: Not Started

- [ ] Step 1: Create Version Navigation Component
- [ ] Step 2: Create Compact Info Bar Component
- [ ] Step 3: Create User Prompt Display Component
- [ ] Step 4: Implement Version Navigation Logic
- [ ] Step 5: Refactor Post Detail Page Layout
- [ ] Step 6: Update PostEditor Component
- [ ] Step 7: Testing and Polish

## Overview

Refactor the post editor UI to be more concise and user-friendly by:

- Removing the extra info column on the right side from the post editor
- Putting concise info (versions, context) above the editor in one row
- Adding navigation to previous and future versions of the post
- Removing the post content preview at the bottom of the post editor
- Showing the user prompt at the bottom of the post editor as read-only reference

## Current State Analysis

### Current Layout Structure

The post detail page (`/dashboard/posts/[id]/page.tsx`) currently uses a 3-column grid layout:

- **Main Content (2/3 width)**: PostEditor component + Current Content Preview card
- **Sidebar (1/3 width)**: VersionHistory + PostContextManager + Post Information cards

### Current Components

- `PostEditor` - Main editing interface with title, content, status, and change summary
- `VersionHistory` - Sidebar component showing all versions with selection capability
- `PostContextManager` - Sidebar component for managing sources and references
- `Current Content Preview` - Card showing the current version content below the editor

## Target State

### New Layout Structure

- **Header**: Post title, metadata, and status (unchanged)
- **Info Bar**: Concise version info, context counts, and version navigation in one row
- **Main Editor**: Full-width PostEditor component (no sidebar)
- **User Prompt Reference**: Read-only display of the user prompt at the bottom

### UI Improvements

1. **Consolidated Info Bar**: Display version count, context counts, and navigation controls
2. **Version Navigation**: Previous/Next buttons to navigate between versions
3. **Simplified Layout**: Remove sidebar, make editor full-width
4. **User Prompt Display**: Show the current version's user prompt as reference

## Implementation Steps

### Step 1: Create Version Navigation Component

Create a new `VersionNavigation` component that provides:

- Current version indicator (e.g., "Version 3 of 5")
- Previous/Next navigation buttons
- Version selection dropdown for quick access
- Compact design suitable for horizontal layout

**Files to create/modify:**

- `components/posts/version-navigation.tsx` - New component
- `components/posts/index.ts` - Export new component

### Step 2: Create Compact Info Bar Component

Create a new `PostInfoBar` component that displays:

- Version navigation (using VersionNavigation component)
- Context counts (X sources, Y references)
- Quick access to context management
- Model information for current version

**Files to create/modify:**

- `components/posts/post-info-bar.tsx` - New component
- `components/posts/index.ts` - Export new component

// Steps 3-7...

## Acceptance Criteria

### Functional Requirements

- [ ] Version navigation works correctly (previous/next buttons)
- [ ] Version selection dropdown shows all versions
- [ ] Context information is displayed compactly above editor
- [ ] User prompt is shown at bottom as read-only reference
- [ ] All existing post editing functionality is preserved
- [ ] Version switching updates editor content correctly

### UI/UX Requirements

- [ ] Layout is more compact and user-friendly
- [ ] No sidebar on the right side of the editor
- [ ] Info bar displays version and context information in one row
- [ ] Editor takes full width of the available space
- [ ] User prompt display is collapsible/expandable
- [ ] Responsive design works on mobile devices

### Technical Requirements

- [ ] No breaking changes to existing API endpoints
- [ ] Component reusability maintained
- [ ] TypeScript types properly defined
- [ ] Existing tests pass or are updated accordingly
- [ ] Performance is not degraded

## Files Involved

### New Files

- `components/posts/version-navigation.tsx`
- `components/posts/post-info-bar.tsx`
- `components/posts/user-prompt-display.tsx`

### Modified Files

- `app/(dashboard)/dashboard/posts/[id]/page.tsx`
- `components/posts/post-editor.tsx`
- `components/posts/index.ts`

### Potentially Affected Files

- E2E tests related to post editing
- Any components that depend on the current layout

## Notes

- Maintain backward compatibility with existing data structures
- Ensure the new layout works well on both desktop and mobile
- Consider accessibility implications of the new navigation controls
- The version navigation should be intuitive and not overwhelming
- User prompt display should be helpful but not intrusive

## Dependencies

- Existing post detail API endpoints
- Current PostEditor component functionality
- Version history data structure
- Context management system
I have published the full task plan sample file on GitHub for your reference.
我已将完整的任务计划示例文件发布在 GitHub 上,供你参考
Note that with the non-deterministic nature of AI agents, the plan is merely a guide for the agent, not a rule that the agent will follow 100%.
请注意,由于人工智能代理的非确定性本质,该计划只是对代理的一个指导,而非代理会完全遵循的规则
I have observed that agents tend to overlook certain instructions or requirements inside the document, especially when the task is complex, or when the initial planning was not very clear on specific parts of the task.
我注意到,智能体往往会忽略文档中的某些指令或要求,尤其是在任务复杂时,或者初始规划对任务的特定部分不太明确时
So it is best to treat it as a draft plan that the agent can reference during the implementation, instead of expecting it be followed religiously.
所以最好将其视为代理在实施过程中可以参考的草稿计划,而不是期望严格遵循它
Claude Code now has a planning mode which performs a similar function as the task planning files. However, the task planning files are still useful. They can serve a persistent reference for future features, as it is part of the repo, and can be accessed easily by humans and agents alike. Claude Code plans are not persistent and are gone after you start a new session.
克劳德代码现在有一个规划模式,其功能与任务规划文件类似。然而,任务规划文件仍然有用。它们可以作为未来功能的持久参考,因为它是代码库的一部分,人类和智能体都可以轻松访问。克劳德代码的规划不是持久的,在你开始新会话后就会消失
Ad Hoc Tasks 临时任务
I also have a dedicated file for tracking ad hoc tasks that are too small for ROADMAP.md, but also significant enough to warrant recording-keeping. They reside inside docs/AD_HOC_TASKS.md.
我还有一个专门的文件来跟踪那些对于 ROADMAP.md 来说太小,但又重要到值得记录的临时任务。它们存放在 docs/AD_HOC_TASKS.md 目录下
I mainly use it for refactoring and small enhancement features that are worth keeping track of. While you can just prompt the coding agent to work on them directly, tracking them inside a file have some benefits:
我主要用它来进行重构和值得记录的小的增强功能。虽然你可以直接提示编码代理去处理它们,但在文件内跟踪它们有一些好处:
For example, when working on a big feature, you notice a small refactoring is needed. You can record it inside
docs/AD_HOC_TASKS.mdfirst and then prompt agent to work on it later.
例如,当处理一个大功能时,你发现需要进行一次小的重构。你可以先把它记录在docs/AD_HOC_TASKS.md里,然后稍后提示助手处理它With the advancement of background async agents, you could also have agents that periodically analyse the codebase, record down refactoring and enhancement opportunities inside the file. Then you can spawn another set of agents to work on them autonomously.
随着后台异步代理的发展,你还可以拥有定期分析代码库、记录文件内重构和改进机会的代理。然后你可以派生出另一组代理来自主处理这些机会
My Claude Code Workflow 我的克劳德代码工作流程
Since most of the workflow is already described in the ROADMAP.md file, the exact workflow I use is quite simple to describe.
由于大部分工作流程已经在 ROADMAP.md 文件中进行了描述,所以我使用的具体工作流程描述起来相当简单
For big features: 对于大型功能:
Describe my requirement (in a few sentences) to the agent, which would update
docs/ROADMAP.mdto add a new task with high-level summary
向代理描述我的需求(用几句话),代理将更新docs/ROADMAP.md以添加一个带有高层摘要的新任务Review the summary captured by the agent and adjust them if necessary (remove unnecessary features, or take care of special interactions)
审核代理捕获的摘要,并在必要时进行调整(移除不必要的特征,或处理特殊交互)

任务的示例高级摘要,有些需要手动编辑
Ask agent to write more detailed plan in individual task files inside
tasksfolder
要求代理在tasks文件夹内的各个任务文件中编写更详细的计划
Note that inside ROADMAP.md, I have instructions for the agent to study the existing codebase and understand the current state before writing the plan, as part of the development workflow. This guides the agent to retrieve relevant context before planning.
请注意,在 ROADMAP.md 中,我有一些指示,要求代理在编写计划之前研究现有代码库并了解当前状态,这是开发工作流程的一部分。这指导代理在规划之前获取相关上下文。
Review the plan generated to see if it is on the right track
检查生成的计划,看它是否在正确的轨道上Prompt the agent to make amendments to the plan if necessary
提示代理在必要时对计划进行修正Ask agent to implement one step at a time (pause after each step and await for human review), or complete the whole task (don’t pause after each step, just proceed to next step automatically until the whole task is completed)
要求代理一次执行一步(每一步后暂停并等待人类审核),或者完成整个任务(每一步后不暂停,自动进行下一步直到整个任务完成)
For small enhancements or refactoring:
对于小的改进或重构:
Record tasks inside
docs/AD_HOC_TASKS.md在docs/AD_HOC_TASKS.md内记录任务Ask Claude Code to implement one-by-one
让克劳德代码逐个实现Do one task per session (Use
/clearcommand or restart Claude Code) to avoid wasting tokens (sending context from previous task to the next task)
每次会话只做一项任务(使用/clear命令或重启 Claude Code),以避免浪费令牌(将上一项任务的上下文发送到下一项任务)
One-Shotting Multi-Step Tasks
单次完成多步骤任务
Lately I have been asking the agent to just work on the task from start to finish instead of waiting for me to approve each step.
最近我一直让代理从始至终完成任务,而不是等着我批准每一步
The internal TODO list of Claude Code is capable of breaking down the task according to the steps in my plan, and executing all of them within one single session.
Claude 代码的内部待办事项列表能够根据我的计划中的步骤分解任务,并在一个会话内执行所有步骤
I found that Claude Code is currently (as of July 2025) capable of working on a task autonomously for about 10-20 minutes, after which the effectiveness goes down as the context gets filled up.
我发现截至 2025 年 7 月,Claude 代码目前能够自主处理一项任务大约 10 到 20 分钟,之后随着上下文信息的填充,其效能会下降
In contrast, Cursor would give you a warning or stop working after 25 tool calls (which typically happens around 5-10 minutes or less).
相比之下,Cursor 在进行 25 次工具调用后会给你一个警告或者停止工作(通常在 5 到 10 分钟或更短时间内就会出现这种情况)
For most of my tasks (consisting of 5-8 steps) on the 16x Writer project, Claude Code was able to complete the task in one session within the context limit, without triggering automatic context compression.
在 16x Writer 项目中,我的大部分任务(包含 5 到 8 个步骤),克劳德代码都能在上下文限制内的一次会话中完成任务,且不会触发自动上下文压缩。
One area that Claude Code still struggles is UI-related debugging (fixing e2e testing). I haven’t tried connecting it to a Playwright MCP due to issues I have with MCP, but I suspect it could help in this particular use case.
Claude Code 仍存在困难的一个领域是与 UI 相关的调试(修复端到端测试)。由于我在 MCP 方面遇到的问题,我还没有尝试将其与 Playwright MCP 连接,但我怀疑它在这个特定用例中可能会有帮助
3rd Party Tools for Claude Code
克劳德代码的第三方工具
I use the following tools alongside Claude Code:
我使用以下工具与 Claude Code 配合使用:
Cursor IDE for providing LSP diagnostic support and GUI for code review
Cursor IDE,用于提供 LSP 诊断支持和代码审查图形用户界面Wispr Flow or similar tool for voice dictation (much faster than typing)
Wispr Flow 或类似的语音听写工具(比打字快得多)ccusage to track how much API usage you would have incurred if you were paying for API instead of Claude subscription
ccusage 用于追踪如果为 API 付费而非使用 Claude 订阅的话,你本会产生的 API 使用量
Personal Tips for Claude Code
克劳德代码的个人小贴士
Here are some tips that I personally use, to get the most out of Claude Code:
以下是我个人使用的一些技巧,以充分利用 Claude 代码:
Keyboard shortcuts inside prompt box
提示框内的键盘快捷键Option + Left / Right Arrow to Jump to previous word or next word
Option + 左/右箭头键跳转到前一个单词或下一个单词Command + Left / Right Arrow to Jump to start of line or end of line
Command + 左/右箭头键跳到行首或行尾Use Ctrl+W to delete full words (Not command + W)
使用 Ctrl+W 删除整个单词(不是 command + W)Keyboard navigation are especially useful when voice dictation makes a mistake
当语音听写出错时,键盘导航特别有用
Hit “Esc” key twice to edit the previous prompt.
按两次“Esc”键以编辑之前的提示Useful for correcting typos or adding clarifications if you see the agent going off the wrong track.
如果发现代理偏离正确轨道,可用于纠正拼写错误或添加说明
Setup custom commands for commonly used tasks such as “work on next task”, “refactor code” or “commit all current changes”. In this way, you can trigger these commands quickly without typing the prompt over and over.
为常用任务设置自定义命令,比如“处理下一个任务”、“重构代码”或“提交所有当前更改”。这样,你就可以快速触发这些命令,而无需反复输入提示内容

克劳德代码自定义斜杠命令
Bypass permissions (auto-accept) by default
默认绕过权限(自动接受)By default you need to press Shift + Tab to toggle on auto-accept, but you can skip this step by using
--dangerously-skip-permissionsflag
默认情况下,你需要按 Shift + Tab 来开启自动接受,但你可以通过使用--dangerously-skip-permissions标志跳过这一步骤I personally setup an alias called
ccto automate this step:
我个人设置了一个名为cc的别名来自动化这个步骤:alias cc="claude --dangerously-skip-permissions"
This way, I don’t need to toggle auto-accept for each new session
这样,我就不需要为每个新会话切换自动接受了
Better local code review experience
更好的本地代码审查体验Claude Code does not open edited files inside IDE by default when auto-accept is on, making local code review quite tedious, especially when changes are across multiple files
当自动接受开启时,Claude Code 默认不会在 IDE 中打开已编辑的文件,这使得本地代码审查相当繁琐,尤其是当更改涉及多个文件时You can use the source control tab in Cursor / VS Code to view the list of changed files and open them quickly
你可以使用 Cursor/VS Code 中的源代码管理标签页来查看已更改文件的列表并快速打开它们

在克劳德代码完成任务后,使用 Cursor IDE 的源代码管理标签页进行本地代码审查
Lastly, remember to check out Claude Code docs regularly for new features or official guides.
最后,记得定期查看克劳德代码文档以了解新功能或官方指南For example, there is a new feature called hooks that you might want to use for enforcing checks.
例如,有一个叫做钩子的新特性,你可能想要用来实施检查。
Other Projects and Ideas 其他项目和想法
Here are some other interesting projects and ideas on Claude Code, that I haven't personally used, but are worth checking out:
以下是关于克劳德代码的其他一些有趣项目和想法,我自己还没有使用过,但值得一看:
GUI for Claude Code 克劳德代码的图形用户界面
Tell Claude you have ast-grep
告诉克劳德你有 ast-grep
Background agents for long running tasks
长时间运行任务的后台代理
Full ROADMAP.md file and sample task planning file available on GitHub
完整的 ROADMAP.md 文件和示例任务规划文件可在 GitHub 上获取
Want to find the best model for your particular use case, but too lazy to test one-by-one? Looking to improve your prompts, but not sure how to evaluate the results?
想要为特定用例找到最佳模型,但懒得逐一测试?希望改进你的提示词,但不确定如何评估结果?
Check out my new app: 16x Eval
看看我的新应用:16 倍评估

16x Eval is a desktop application, offering you a local workspace for prompt engineering and model evaluation.
16x Eval 是一款桌面应用程序,为您提供用于提示工程和模型评估的本地工作空间
Setup your own personal evals in minutes. Experiment with different combinations of prompts and models to find the best fit for your use case.
在几分钟内设置你自己的个人评估。尝试不同的提示词和模型组合,以找到最适合你用例的方案


Very helpful article. Actually, I think most of us did realize by now planning docs are necessary, I have used them extensively with Cursor even before I added Claude Code to the mix. Another good idea is to divide the project into "zones" and concentrate our reviews and full attention only on the core where AI's mistakes might really matter.
非常有用的文章。实际上,我认为现在我们大多数人已经意识到规划文档是必要的,甚至在我将克劳德代码集成进来之前,我就已经在 Cursor 中广泛使用它们了。另一个好主意是将项目分成“区域”,只将我们的审查和全部注意力集中在人工智能错误可能真正重要的核心部分。