Lesson 2: Triangle rasterization and back face culling
第 2 课:三角形光栅化与背面剔除
I am working on a v2 of the series, check the new text for this lesson here: https://ssloy.github.io/tinyrenderer/rasterization/
我正在制作这一系列的 v2 版本,有关本课的新文本请参阅这里:https://ssloy.github.io/tinyrenderer/rasterization
Hi, everyone. It’s me.
大家好,是我。
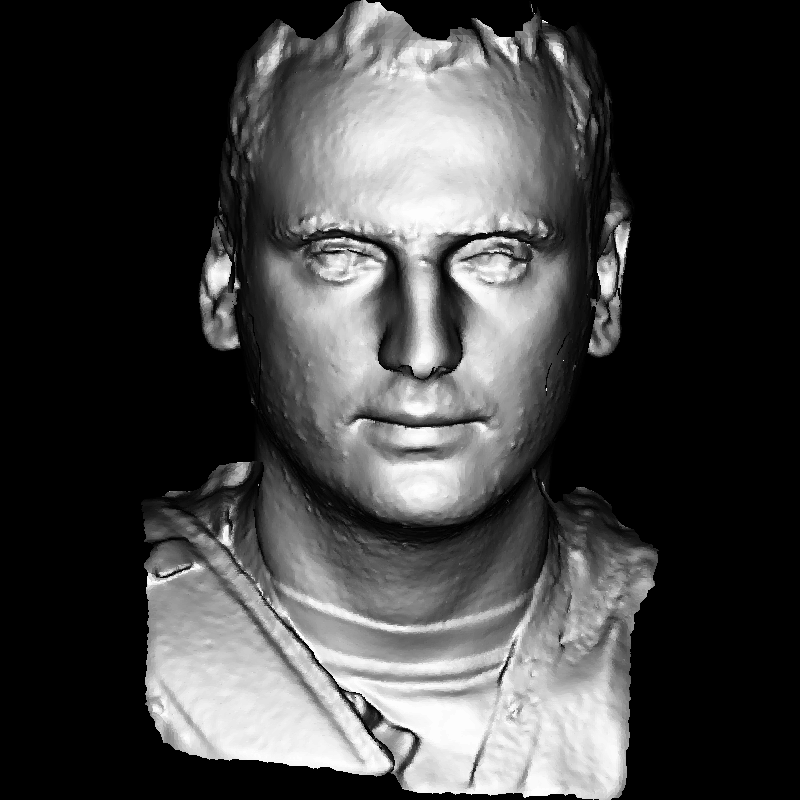
More precisely, it is a model of my face rendered in the program we will be creating in the next hour or two. Last time we drew the wire mesh of a three-dimensional model. This time, we will fill polygons, or rather triangles. In fact, OpenGL triangulates almost any polygon, so there’s no need to consider sophisticated cases.
更准确地说,这是我们在接下来的一两个小时里将要创建的程序中渲染的我的脸的模型。上次我们绘制了一个三维模型的线框。这次,我们将填充多边形,或者说三角形。实际上,OpenGL 几乎会将任何多边形三角化,因此我们不需要考虑复杂的特殊情况。
Let me remind you, this series of articles is designed to allow you to program yourself. When I said that in two hours you can draw a picture like the one above, I did not mean the time to read my code. It’s time for creating your code from scratch. My code is provided here purely to compare your (working) program with mine. I am an awful programmer, it is very likely that you are a better one. Do not simply copy-paste my code. Any comments and questions are welcome.
让我提醒你,这一系列文章旨在让你自己编程。当我提到在两小时内你可以画出上面的图片时,我并不是指阅读我的代码所需的时间。而是指从零开始编写你的代码。我提供的代码只是为了让你的程序与我的程序进行比较。我可能是一个糟糕的程序员,你很可能比我还好。请不要简单地复制粘贴我的代码。任何意见和问题都欢迎提出。
Thus, the task is to draw two-dimensional triangles. For motivated students it normally takes a couple of hours, even if they are bad programmers. Last time we saw Bresenham’s line drawing algorithm. Today’s task is to draw a filled triangle. Funny enough, but this task is not trivial. I don’t know why, but I know that it’s true. Most of my students struggle with this simple task.
So, the initial stub will look like this:
因此,任务是绘制二维三角形。即使是糟糕的程序员,有动力的学生也需要几个小时才能完成。上次我们学习了 Bresenham 直线绘制算法。今天的任务是绘制填充三角形。有趣的是,这个任务并不简单。我不知道为什么,但我确信这是真的。我的大多数学生都难以完成这个简单的任务。因此,初始的代码框架如下:
void triangle(Vec2i t0, Vec2i t1, Vec2i t2, TGAImage &image, TGAColor color) {
    line(t0, t1, image, color);
    line(t1, t2, image, color);
    line(t2, t0, image, color);
}

// ...

Vec2i t0[3] = {Vec2i(10, 70),   Vec2i(50, 160),  Vec2i(70, 80)};
Vec2i t1[3] = {Vec2i(180, 50),  Vec2i(150, 1),   Vec2i(70, 180)};
Vec2i t2[3] = {Vec2i(180, 150), Vec2i(120, 160), Vec2i(130, 180)};
triangle(t0[0], t0[1], t0[2], image, red);
triangle(t1[0], t1[1], t1[2], image, white);
triangle(t2[0], t2[1], t2[2], image, green);
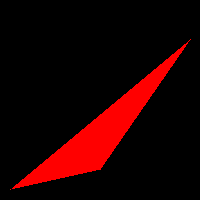
As usual, the appropriate commit is available on GitHub here. The code is simple: I provide three triangles for the initial debugging of your code. If we invoke line() inside the triangle function, we’ll get the contour of the triangle. How to draw a filled triangle?
如往常一样,相关的提交可以在 GitHub 上找到。代码很简单:我提供了三个三角形用于你代码的初步调试。如果在三角形函数中调用 line() ,我们将得到三角形的轮廓。如何绘制填充的三角形?
A good method of drawing a triangle must have the following features:
绘制三角形的好方法应该具备以下特点:
- It should be (surprise!) simple and fast.
它应该是(惊喜!)简单且快速的。 - It should be symmetrical: the picture should not depend on the order of vertices passed to the drawing function.
它应该是对称的:图像不应该依赖于传递给绘制函数的顶点顺序。 - If two triangles have two common vertices, there should be no holes between them because of rasterization rounding.
如果两个三角形有两共用顶点,由于光栅化舍入的原因,它们之间不应该有空洞。 - We could add more requirements, but let’s do with these ones. Traditionally a line sweeping is used:
我们可以添加更多的要求,但就先用这些吧。传统的方法是:
- Sort vertices of the triangle by their y-coordinates;
按三角形顶点的 y 坐标排序; - Rasterize simultaneously the left and the right sides of the triangle;
同时光栅化三角形的左边界和右边界; - Draw a horizontal line segment between the left and the right boundary points.
在左右边界点之间绘制一条水平线段。
At this point my students start to lose the firm ground: which segment is the left one, which one is right? Besides, there are three segments in a triangle... Usually, after this introduction I leave my students for about an hour: once again, reading my code is much less valuable than comparing your own code with mine.
此时我的学生们开始失去方向:哪条是左边的线段,哪条是右边的?而且三角形中有三条线段……通常,在介绍完这些内容后,我会让学生们休息大约一个小时:再次阅读我的代码远不如将自己的代码与我的代码进行比较有价值。
[One hour passes] [一个小时后]
How do I draw a triangle? Once again, if you have a better method, I’d be glad to adopt it. Let us assume that we have three points of the triangle: t0, t1, t2, they are sorted in ascending order by the y-coordinate. Then, the boundary A is between t0 and t2, boundary B is between t0 and t1, and then between t1 and t2.
如何绘制一个三角形?再次强调,如果你有更好的方法,我很乐意采用。假设我们有三角形的三个点:t0、t1、t2,它们按照 y 坐标升序排列。那么,边界 A 在 t0 和 t2 之间,边界 B 在 t0 和 t1 之间,然后在 t1 和 t2 之间。
void triangle(Vec2i t0, Vec2i t1, Vec2i t2, TGAImage &image, TGAColor color) {
// sort the vertices, t0, t1, t2 lower−to−upper (bubblesort yay!)
if (t0.y>t1.y) std::swap(t0, t1);
if (t0.y>t2.y) std::swap(t0, t2);
if (t1.y>t2.y) std::swap(t1, t2);
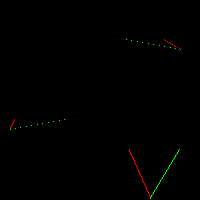
line(t0, t1, image, green);
line(t1, t2, image, green);
line(t2, t0, image, red);
}Here boundary A is red, and boundary B is green.
这里边界 A 是红色,边界 B 是绿色。

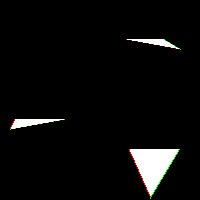
Unfortunately, boundary B is made of two parts. Let us draw the bottom half of the triangle by cutting it horizontally:
不幸的是,边界 B 由两部分组成。让我们通过水平切割来绘制三角形的下半部分:
void triangle(Vec2i t0, Vec2i t1, Vec2i t2, TGAImage &image, TGAColor color) {
    // sort the vertices, t0, t1, t2 lower−to−upper (bubblesort yay!)
    if (t0.y>t1.y) std::swap(t0, t1);
    if (t0.y>t2.y) std::swap(t0, t2);
    if (t1.y>t2.y) std::swap(t1, t2);
    int total_height = t2.y-t0.y;
    for (int y=t0.y; y<=t1.y; y++) {
        int segment_height = t1.y-t0.y+1;
        float alpha = (float)(y-t0.y)/total_height;
        float beta  = (float)(y-t0.y)/segment_height; // be careful with divisions by zero
        Vec2i A = t0 + (t2-t0)*alpha;
        Vec2i B = t0 + (t1-t0)*beta;
        image.set(A.x, y, red);
        image.set(B.x, y, green);
    }
}
Note that the segments are not continuous. Last time when we drew straight lines we struggled to get continuous segments and here I did not bother with rotating the image (remember the xy swapping?). Why? We fill the triangles aftewards, that’s why. If we connect the corresponding pairs of points by horizontal lines, the gaps disappear:
请注意,这些线段是不连续的。上次我们绘制直线时,我们费了好大劲才得到连续的线段,而这次我没有费心去旋转图像(记得 xy 坐标交换的事吗?)。为什么?因为我们之后要填充三角形,所以不需要连续的线段。如果我们用水平线连接相应的点对,这些间隙就会消失:
Now, let us draw the second (upper) half of the triangle. We can do this by adding a second loop:
现在,让我们绘制三角形的第二(上半)部分。我们可以通过添加第二个循环来实现这一点:
void triangle(Vec2i t0, Vec2i t1, Vec2i t2, TGAImage &image, TGAColor color) {
    // sort the vertices, t0, t1, t2 lower−to−upper (bubblesort yay!)
    if (t0.y>t1.y) std::swap(t0, t1);
    if (t0.y>t2.y) std::swap(t0, t2);
    if (t1.y>t2.y) std::swap(t1, t2);
    int total_height = t2.y-t0.y;
    for (int y=t0.y; y<=t1.y; y++) {
        int segment_height = t1.y-t0.y+1;
        float alpha = (float)(y-t0.y)/total_height;
        float beta  = (float)(y-t0.y)/segment_height; // be careful with divisions by zero
        Vec2i A = t0 + (t2-t0)*alpha;
        Vec2i B = t0 + (t1-t0)*beta;
        if (A.x>B.x) std::swap(A, B);
        for (int j=A.x; j<=B.x; j++) {
            image.set(j, y, color); // attention, due to int casts t0.y+i != A.y
        }
    }
    for (int y=t1.y; y<=t2.y; y++) {
        int segment_height =  t2.y-t1.y+1;
        float alpha = (float)(y-t0.y)/total_height;
        float beta  = (float)(y-t1.y)/segment_height; // be careful with divisions by zero
        Vec2i A = t0 + (t2-t0)*alpha;
        Vec2i B = t1 + (t2-t1)*beta;
        if (A.x>B.x) std::swap(A, B);
        for (int j=A.x; j<=B.x; j++) {
            image.set(j, y, color); // attention, due to int casts t0.y+i != A.y
        }
    }
}
This could be enough, but I dislike to see the same code twice. That is why we will make it a bit less readable, but more handy for modifications/maintaining:
这已经足够了,但我不喜欢看到相同的代码出现两次。这就是我们要让它稍微降低可读性,但更便于修改和维护的原因:
void triangle(Vec2i t0, Vec2i t1, Vec2i t2, TGAImage &image, TGAColor color) {
    if (t0.y==t1.y && t0.y==t2.y) return; // I dont care about degenerate triangles
    // sort the vertices, t0, t1, t2 lower−to−upper (bubblesort yay!)
    if (t0.y>t1.y) std::swap(t0, t1);
    if (t0.y>t2.y) std::swap(t0, t2);
    if (t1.y>t2.y) std::swap(t1, t2);
    int total_height = t2.y-t0.y;
    for (int i=0; i<total_height; i++) {
        bool second_half = i>t1.y-t0.y || t1.y==t0.y;
        int segment_height = second_half ? t2.y-t1.y : t1.y-t0.y;
        float alpha = (float)i/total_height;
        float beta  = (float)(i-(second_half ? t1.y-t0.y : 0))/segment_height; // be careful: with above conditions no division by zero here
        Vec2i A =               t0 + (t2-t0)*alpha;
        Vec2i B = second_half ? t1 + (t2-t1)*beta : t0 + (t1-t0)*beta;
        if (A.x>B.x) std::swap(A, B);
        for (int j=A.x; j<=B.x; j++) {
            image.set(j, t0.y+i, color); // attention, due to int casts t0.y+i != A.y
        }
    }
}
Here’s the commit for drawing 2D triangles.
这是绘制 2D 三角形的提交。
While not being really complicated, the source code for the line sweeping is a bit messy. Moreover, it is really an old-school approach designed for mono-thread CPU programming. Let us take a look at the following pseudo-code:
虽然线扫算法的源代码并不复杂,但代码有些凌乱。此外,这确实是一种为单线程 CPU 编程设计的古老方法。让我们来看一下以下伪代码:
triangle(vec2 points[3]) {
    vec2 bbox[2] = find_bounding_box(points);
    for (each pixel in the bounding box) {
        if (inside(points, pixel)) {
            put_pixel(pixel);
        }
    }
}
Do you like it? I do. It is really easy to find a bounding box. It is certainly no problem to check whether a point belongs a 2D triangle (or any convex polygon).
你喜欢吗?我喜欢。确实很容易找到一个包围盒。检查一个点是否属于一个二维三角形(或任何凸多边形)肯定也没有问题。
Off Topic: if I have to implement some code to check whether a point belongs to a polygon, and this program will run on a plane, I will never get on this plane. Turns out, it is a surprisingly difficult task to solve this problem reliably. But here we just painting pixels. I am okay with that.
扯点题外话:如果我必须实现一些代码来检查一个点是否属于一个多边形,并且这个程序将在一个平面上运行,那我可能永远都不会踏上这个平面。原来,可靠地解决这个问题是出奇地困难。但在这里,我们只是在画像素点。这对我来说完全没问题。
There is another thing I like about this pseudocode: a neophyte in programming accepts it with enthusiasm, more experienced programmers often chuckle: “What an idiot wrote it?”. And an expert in computer graphics programming will shrug his shoulders and say: “Well, that’s how it works in real life”. Massively parallel computations in thousands of threads (i’m talking about regular consumer computers here) change the way of thinking.
我还喜欢这段伪代码的另一点:初学者看到它会兴奋不已,有经验的程序员则常常会笑着说:“这是个什么鬼写的?”而计算机图形编程的专家则耸耸肩说:“嗯,现实就是这样”。成千上万个线程的并行计算(这里指的是普通消费级计算机)改变了我们的思维方式。
Okay, let us start: first of all we need to know what the barycentric coordinates are. Given a 2D triangle ABC and a point P, all in old good Cartesian coordinates (xy). Our goal is to find barycentric coordinates of the point P with respect to the triangle ABC. It means that we look for three numbers (1 − u − v,u,v) such that we can find the point P as follows:
好的,我们开始吧:首先我们需要知道什么是巴氏坐标。给定一个二维三角形 ABC 和一个点 P,都在传统的笛卡尔坐标系(xy)中。我们的目标是找到点 P 相对于三角形 ABC 的巴氏坐标。这意味着我们要寻找三个数(1−u−v, u, v),使得我们可以找到点 P 如下:
![]()
While being a bit frightening at the first glance, it is really simple: imagine that we put three weights (1 −u−v,u,v) at the vertices A, B and C, respectively. Then the barycenter of the system is exactly in the point P. We can say the same thing with other words: the point P has coordinates (u,v) in the (oblique) basis (A,![]() ,
,![]() ):
):
初看之下可能会有些吓人,但实际上非常简单:想象我们在顶点 A、B 和 C 分别放置三个重量(1-u-v、u、v)。那么,系统的重心正好位于点 P。我们还可以用另一种方式说:点 P 在斜坐标系(A, ![]() ,
, ![]() )中的坐标为(u,v)。
)中的坐标为(u,v)。
![]()
So, we have vectors ![]() ,
, ![]() and
and ![]() , we need to find two real numbers u and v respecting the following constraint:
, we need to find two real numbers u and v respecting the following constraint:
所以我们有向量 ![]() 、
、 ![]() 和
和 ![]() ,我们需要找到两个实数 u 和 v,满足以下约束:
,我们需要找到两个实数 u 和 v,满足以下约束:
![]()
It is a simple vector equation, or a linear system of two equations with two variables:
这是一个简单的向量方程,或者说是两个变量的两个线性方程组:
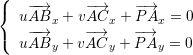
I am lazy and do not want to solve linear systems in a scholar way. Let us write it in matrix form:
我懒得用传统方法解线性方程组,我们把它写成矩阵形式:

It means that we are looking for a vector (u,v,1) that is orthogonal to (ABx,ACx,PAx) and (ABy,ACy,PAy) at the same time! I hope you see where I am heading. That is a small hint: to find an intersection of two straight lines in a plane (that is exactly what we did here), it is sufficient to compute one cross product. By the way, test yourself: how do we find an equation of a line passing through two given points?
这意味着我们要找一个向量(u,v,1),它同时与(ABx,ACx,PAx)和(ABy,ACy,PAy)垂直!我希望你能看出我想要的方向。这是一个小小的提示:要在平面上找到两条直线的交点(而这正是我们在这里所做的),只需要计算一个叉积即可。顺便问一下,你自己试试看:如何通过两个给定点找到一条直线的方程?
So, let us program our new rasterization routine: we iterate through all pixels of a bounding box for a given triangle. For each pixel we compute its barycentric coordinates. If it has at least one negative component, then the pixel is outside of the triangle. Probably it is more clear to see the program directly:
那么,让我们来编写新的光栅化程序:我们遍历给定三角形的边界框中的所有像素。对于每个像素,我们计算其巴氏坐标。如果其至少有一个负分量,则该像素位于三角形之外。可能直接看程序会更清楚:
#include <vector>
#include <iostream>
#include "geometry.h"
#include "tgaimage.h"

const int width  = 200;
const int height = 200;

Vec3f barycentric(Vec2i *pts, Vec2i P) {
    Vec3f u = Vec3f(pts[2][0]-pts[0][0], pts[1][0]-pts[0][0], pts[0][0]-P[0])^Vec3f(pts[2][1]-pts[0][1], pts[1][1]-pts[0][1], pts[0][1]-P[1]);
    /* `pts` and `P` has integer value as coordinates
       so `abs(u[2])` < 1 means `u[2]` is 0, that means
       triangle is degenerate, in this case return something with negative coordinates */
    if (std::abs(u.z)<1) return Vec3f(-1,1,1);
    return Vec3f(1.f-(u.x+u.y)/u.z, u.y/u.z, u.x/u.z);
}

void triangle(Vec2i *pts, TGAImage &image, TGAColor color) {
    Vec2i bboxmin(image.get_width()-1,  image.get_height()-1);
    Vec2i bboxmax(0, 0);
    Vec2i clamp(image.get_width()-1, image.get_height()-1);
    for (int i=0; i<3; i++) {
        bboxmin.x = std::max(0, std::min(bboxmin.x, pts[i].x));
	bboxmin.y = std::max(0, std::min(bboxmin.y, pts[i].y));

	bboxmax.x = std::min(clamp.x, std::max(bboxmax.x, pts[i].x));
	bboxmax.y = std::min(clamp.y, std::max(bboxmax.y, pts[i].y));
    }
    Vec2i P;
    for (P.x=bboxmin.x; P.x<=bboxmax.x; P.x++) {
        for (P.y=bboxmin.y; P.y<=bboxmax.y; P.y++) {
            Vec3f bc_screen  = barycentric(pts, P);
            if (bc_screen.x<0 || bc_screen.y<0 || bc_screen.z<0) continue;
            image.set(P.x, P.y, color);
        }
    }
}

int main(int argc, char** argv) {
    TGAImage frame(200, 200, TGAImage::RGB);
    Vec2i pts[3] = {Vec2i(10,10), Vec2i(100, 30), Vec2i(190, 160)};
    triangle(pts, frame, TGAColor(255, 0, 0));
    frame.flip_vertically(); // to place the origin in the bottom left corner of the image
    frame.write_tga_file("framebuffer.tga");
    return 0;
}
barycentric() function computes coordinates of a point P in a given triangle, we already saw the details. Now let us see how works triangle() function. First of all, it computes a bounding box, it is described by two points: bottom left and upper right. To find these corners we iterate through the vertices of the triangle and choose min/max coordinates. I also added a clipping of the bounding box with the screen rectangle to spare the CPU time for the triangles outside of the screen. Congratulations, you know how to draw a triangle!
`barycentric()` 函数计算给定三角形中点 P 的坐标,我们已经看到了详细的实现。现在让我们看看 `triangle()` 函数是如何工作的。首先,它计算一个边界框,由两个点描述:左下角和右上角。为了找到这些角点,我们遍历三角形的顶点并选择最小值和最大值坐标。我还为边界框添加了与屏幕矩形的裁剪,以节省不在屏幕范围内的三角形的 CPU 时间。恭喜,你现在知道如何绘制三角形了!
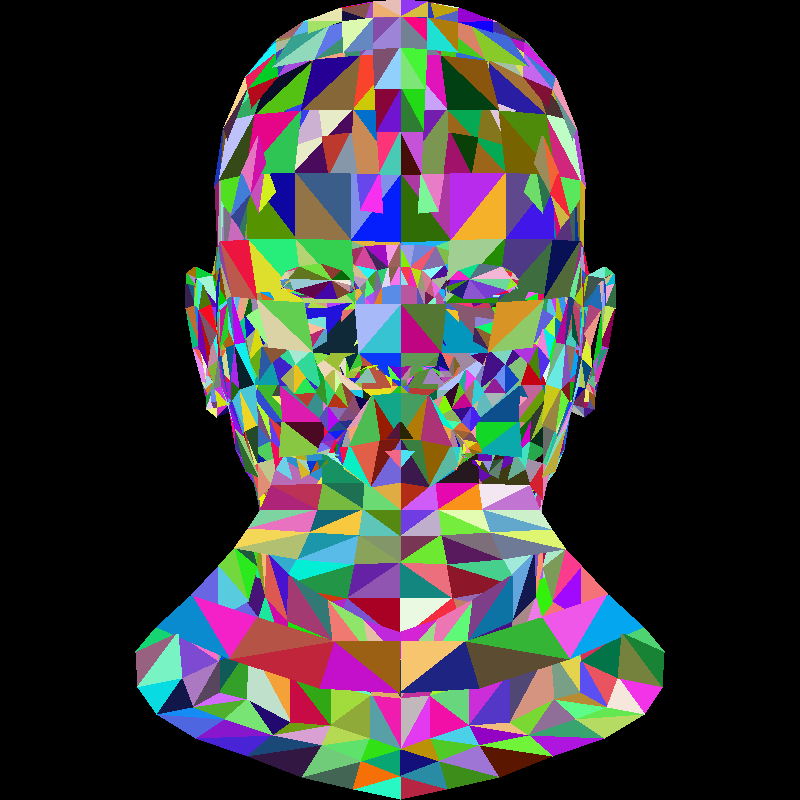
We already know how to draw a model with empty triangles. Let us fill them with a random color. This will help us to see how well we have encoded filling of triangles. Here is the code:
我们已经知道如何绘制由空三角形组成的模型。现在让我们用随机颜色填充这些三角形。这将帮助我们检查我们是否正确地编码了三角形的填充。以下是代码:
for (int i=0; i<model->nfaces(); i++) {
    std::vector<int> face = model->face(i);
    Vec2i screen_coords[3];
    for (int j=0; j<3; j++) {
        Vec3f world_coords = model->vert(face[j]);
        screen_coords[j] = Vec2i((world_coords.x+1.)*width/2., (world_coords.y+1.)*height/2.);
    }
    triangle(screen_coords[0], screen_coords[1], screen_coords[2], image, TGAColor(rand()%255, rand()%255, rand()%255, 255));
}
It is simple: just like before, we iterate through all the triangles, convert world coordinates to screen ones and draw triangles. I will provide the detailed description of various coordinate systems in my following articles. Current picture looks something like this:
很简单:就像之前一样,我们遍历所有三角形,将世界坐标转换为屏幕坐标并绘制三角形。我将在后续的文章中详细描述各种坐标系。当前的画面大致如下:
Let us get rid of these clown-colors and put some lighting. Captain Obvious: ”At the same light intensity, the polygon is illuminated most brightly when it is orthogonal to the light direction.”
让我们摆脱这些滑稽的颜色,加入一些光照。显而易见的船长:“在相同的光照强度下,当多边形与光照方向垂直时,光照效果最亮。”
Let us compare: 让我们比较一下:

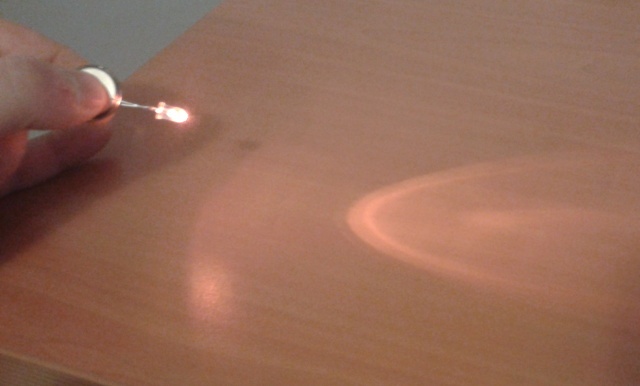
We get zero illumination if the polygon is parallel to the vector of light. To paraphrase: the intensity of illumination is equal to the scalar product of the light vector and the normal to the given triangle. The normal to the triangle can be calculated simply as the cross product of its two sides.
如果多边形与光源向量平行,则光照强度为零。换句话说:光照强度等于光源向量与给定三角形法线的标量积。三角形的法线可以通过计算其两边的叉积简单得到。
As a side note, at this course we will perform linear computations on the colors. However (128,128,128) color is not half as bright as (255, 255, 255). We are going to ignore gamma correction and tolerate the incorrectness of the brightness of our colors.
顺便提一下,在这门课程中,我们将对颜色进行线性计算。然而,(128,128,128)颜色的亮度并不等于(255,255,255)的一半。我们将忽略伽马校正,并容忍我们颜色亮度的不准确性。
Vec3f light_dir(0,0,-1); // define light_dir

for (int i=0; i<model->nfaces(); i++) {
    std::vector<int> face = model->face(i);
    Vec2i screen_coords[3];
    Vec3f world_coords[3];
    for (int j=0; j<3; j++) {
        Vec3f v = model->vert(face[j]);
        screen_coords[j] = Vec2i((v.x+1.)*width/2., (v.y+1.)*height/2.);
        world_coords[j]  = v;
    }
    Vec3f n = (world_coords[2]-world_coords[0])^(world_coords[1]-world_coords[0]);
    n.normalize();
    float intensity = n*light_dir;
    if (intensity>0) {
        triangle(screen_coords[0], screen_coords[1], screen_coords[2], image, TGAColor(intensity*255, intensity*255, intensity*255, 255));
    }
}
But the dot product can be negative. What does it mean? It means that the light comes from behind the polygon. If the scene is well modelled (it is usually the case), we can simply discard this triangle. This allows us to quickly remove some invisible triangles. It is called Back-face culling.
但是点积可以是负数。这意味着光源来自多边形的背面。如果场景建模得当(通常都是这样),我们可以简单地丢弃这个三角形。这允许我们快速去除一些不可见的三角形,这种方法称为背面剔除。
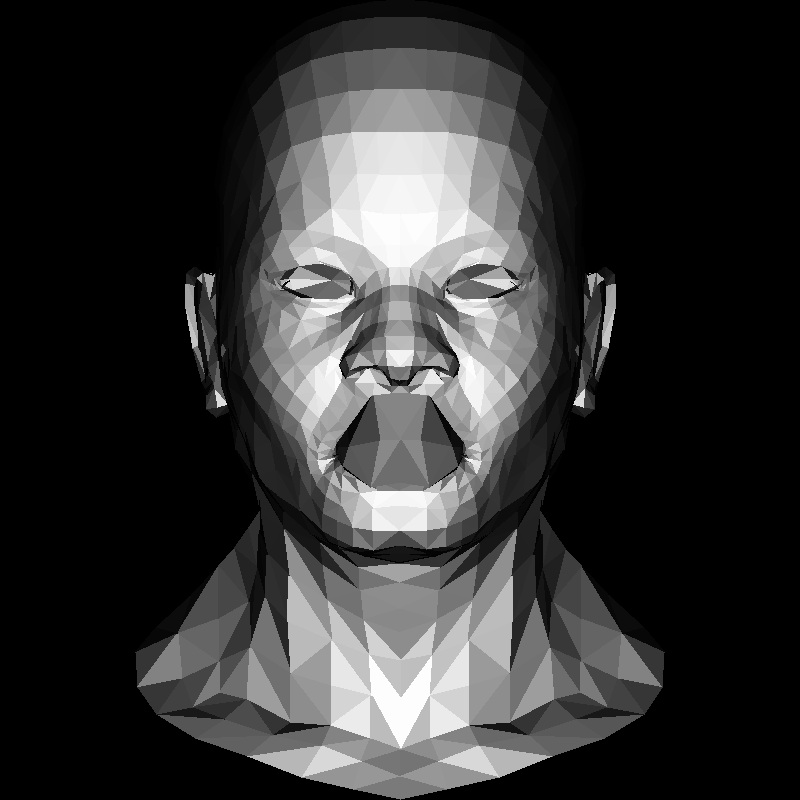
Note that the inner cavity of the mouth is drawn on top of the lips. That is because of our dirty clipping of invisible triangles: it works perfectly for convex shapes only. We will get rid of this artifact next time when we encode the z-buffer.
请注意,嘴巴内部的空洞是绘制在嘴唇之上的。这是因为我们对不可见三角形的裁剪很脏:这仅适用于凸形状。下次当我们编码 z 缓冲区时,我们会解决这个问题。
Here’s the current version of the render. Do you find that the image of my face was more detailed? Well, I cheated a bit: there is a quarter million triangles in it vs. roughly a thousand in this artificial head model. But my face was indeed rendered with the above code. I promise you that in following articles we will add much more details to this image.
这是当前的渲染版本。你觉得我的脸更详细了吗?其实我稍微作弊了一点:这张图中有大约二十五万三角形,而那个人工头模型只有大约一千个三角形。但我的脸确实使用了上述代码进行渲染。我保证在接下来的文章中,我们会为这张图添加更多的细节。